Category: How to

How to tutorials and basics for the garden.

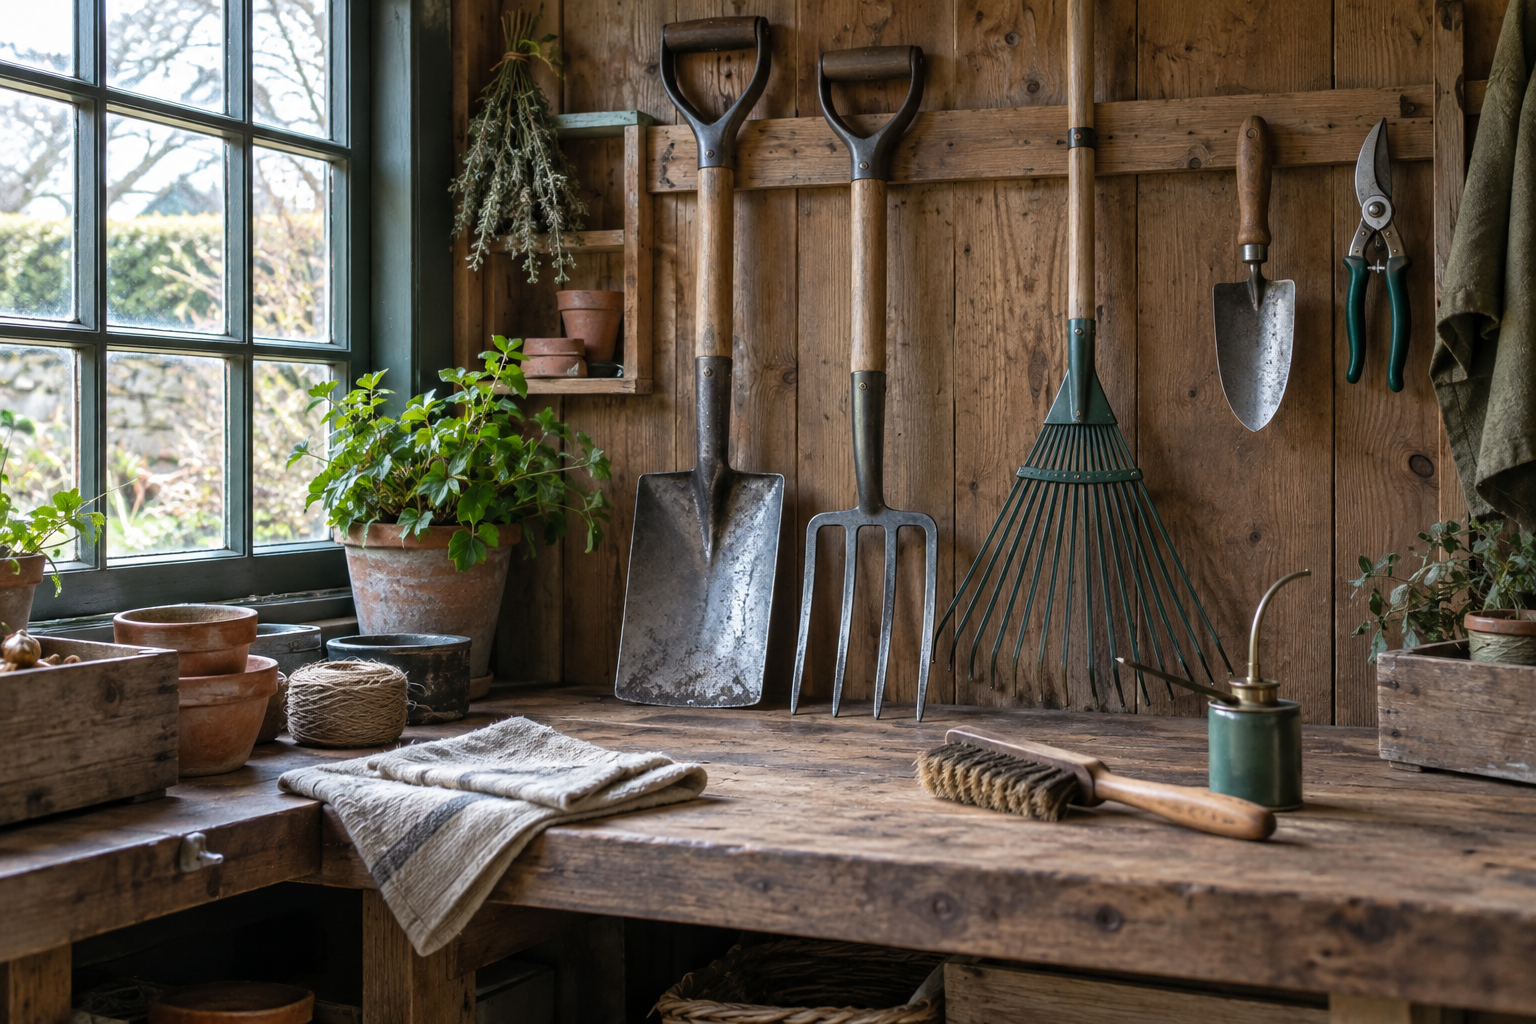
  • How to clean and store garden tools for winter

    How to clean and store garden tools for winter

    The end of the main growing season is a useful time to deal with tools before they disappear into a damp shed for several months. Soil, sap and moisture left on metal encourage corrosion, while loose handles and blunt blades are easier to fix now than when spring work has already begun.

    Winter tool care does not need to become a large restoration project. A methodical hour with the tools you use most can prevent many common failures.

    Start by sorting what you actually use

    Bring together hand tools, spades, forks, secateurs, loppers and saws. Separate tools that are ready for routine cleaning from those needing repair.

    This is also a good moment to identify duplicates or damaged tools that are taking up storage space without being useful.

    Remove soil from metal surfaces

    Allow heavy clay to dry slightly if that makes it easier to brush away. Use a stiff brush or wooden scraper rather than immediately storing tools covered in wet soil.

    If tools are washed, dry them thoroughly afterwards.

    Remove sap and resin

    Pruning tools often develop sticky deposits that interfere with blade movement. Clean these before storage using an appropriate cleaner for the tool.

    Pay particular attention to pivots and areas where two blades move against each other.

    Inspect for rust

    Light surface rust can often be removed with a fine abrasive or wire brush. Once clean, protect bare steel with a very light coating of suitable oil.

    Deep corrosion, cracks or severe thinning may indicate that the part is no longer safe.

    Check wooden handles

    Look for splits, rough fibres and looseness where the handle enters the metal socket. Light sanding can remove uncomfortable roughness.

    Depending on the wood and manufacturer recommendations, a suitable oil can help prevent the handle becoming excessively dry.

    Tighten loose fittings

    Check bolts, screws and pivots. A small amount of movement now can become a major failure when the tool is under load.

    Replace missing fasteners with appropriate parts rather than improvising with something that changes the tool’s strength or movement.

    Sharpen cutting tools

    Secateurs, loppers, hoes and some spades benefit from a maintained cutting edge. Sharpen according to the original blade geometry rather than making every tool razor sharp.

    Saws generally require specialist sharpening or blade replacement depending on their design.

    Lubricate pivots and springs

    After cleaning, place a small amount of appropriate lubricant on moving joints. Open and close the tool several times to distribute it, then wipe away excess.

    Store tools dry and off the ground

    A damp concrete or soil floor is a poor place for metal tools. Hang long-handled tools where possible or store them in a rack with good airflow.

    Avoid wrapping damp tools tightly in plastic because trapped moisture can accelerate corrosion.

    Think about safety

    Close and lock secateurs, cover exposed saw teeth where appropriate and store sharp edges where they cannot be reached accidentally.

    Heavy long-handled tools should be secure rather than balanced loosely against a wall where they can fall.

    Repair or replace?

    Quality tools are often repairable. Handles, blades, springs and bolts may all be replaceable depending on the design.

    Repair makes sense where the structural parts remain sound. A cracked socket, severely bent fork or badly weakened metal may need professional assessment or replacement.

    A clean tool is easier to reach for

    Winter maintenance has a practical benefit beyond extending tool life. When the first planting and pruning jobs arrive in spring, tools are ready to use rather than becoming another job that needs doing first.

    See also Keeping garden tools in good condition and Preparing the garden for winter.
  • How to stake tall perennials discreetly

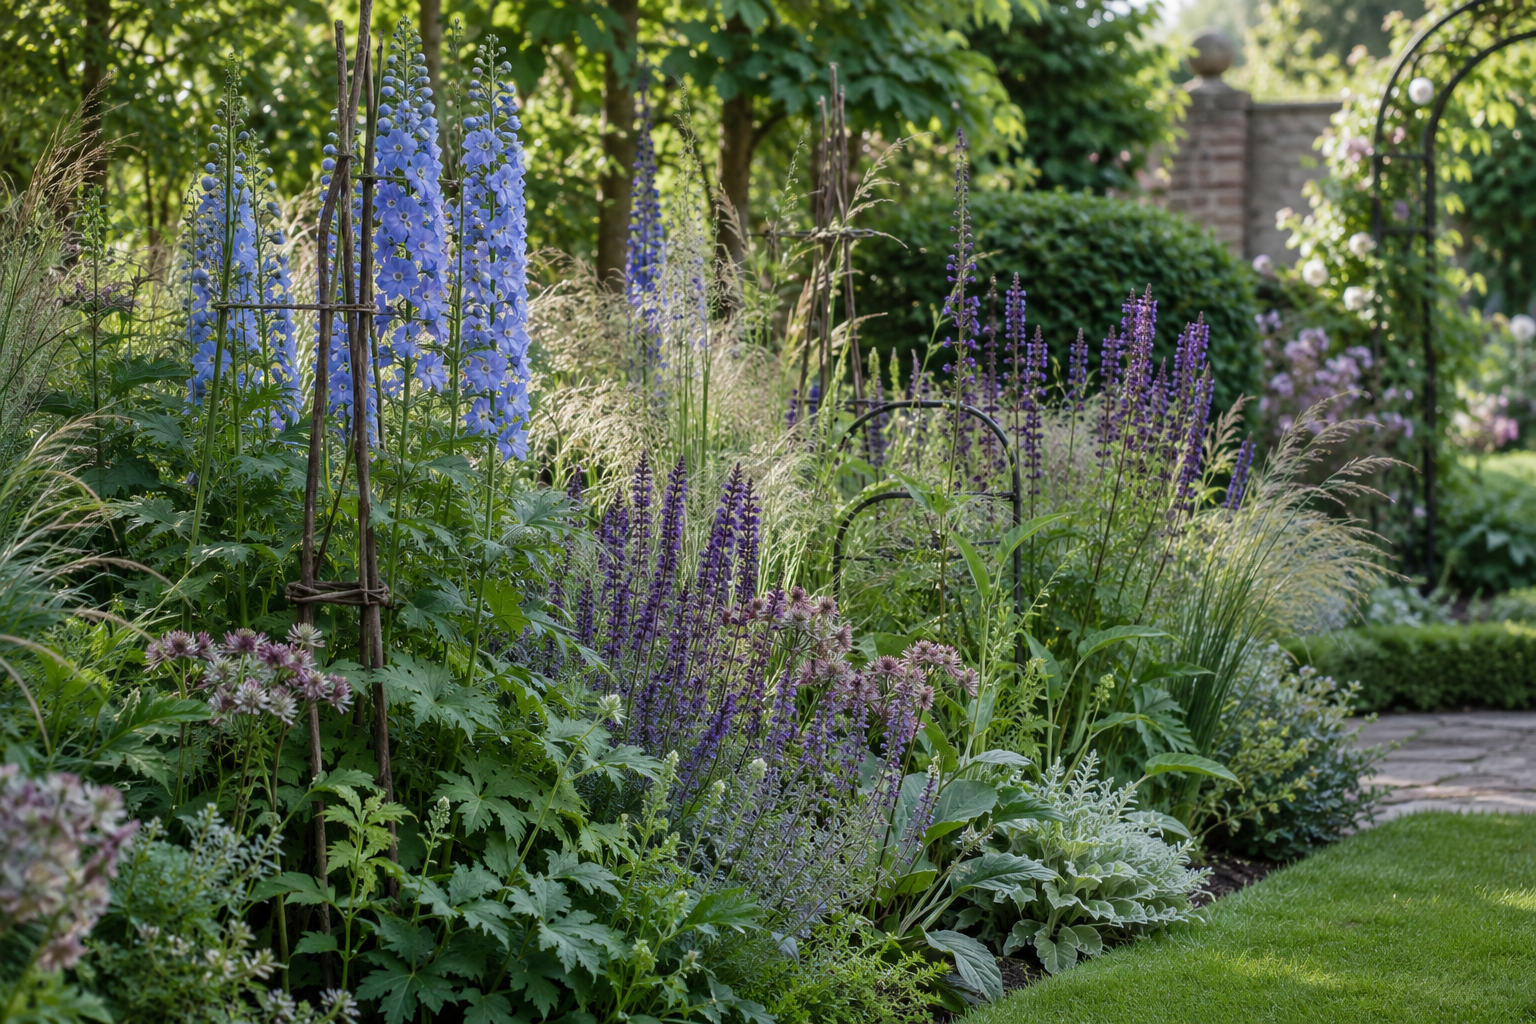
    How to stake tall perennials discreetly

    Plant supports work best when you hardly notice them. Tall perennials can collapse after wind and rain, but heavy staking added after stems have already fallen often leaves a border looking tied together rather than naturally supported.

    The most effective technique is usually to provide support early, while stems are still growing through and around it.

    Which plants need support?

    Not every tall perennial needs staking. Plants growing in rich soil or partial shade may become taller and softer than the same variety in leaner, sunnier conditions.

    Repeatedly collapsing plants, large heavy flower heads and exposed positions are useful signs that support may help.

    Support early

    Install supports while plants are still relatively short. As the stems grow, foliage hides the structure and the support becomes integrated into the plant.

    Waiting until flowering stems have fallen usually requires taller stakes and visible ties.

    Use twiggy branches for informal support

    Branched prunings pushed into the soil around an emerging clump create a natural network through which stems can grow.

    This traditional method is particularly effective in informal planting because the support almost disappears once foliage develops.

    Metal grow-through supports

    Grid or ring supports positioned over a young plant allow stems to emerge through separate openings. They are useful for large clump-forming perennials and plants with multiple flowering stems.

    Choose a support that will finish below the mature flower heads so the plant remains visually dominant.

    Individual stakes

    A single tall stem may need its own stake. Position the stake close enough to support the stem without driving it directly through the main crown or root system.

    Tie the stem loosely enough to allow some natural movement and thickening.

    Use soft ties

    Wire and very thin string can cut into growing stems. Use soft garden twine or flexible ties that spread pressure over a wider area.

    Check ties later in the season because stems may expand considerably.

    Do not pull every stem into a tight bundle

    A common mistake is to tie a wide clump tightly to one central stake. This changes the natural shape of the plant and creates an obvious narrow waist.

    Several discreet supports around the clump usually produce a more natural outline.

    Consider neighbouring plants

    Dense surrounding planting can provide a degree of natural support. Strong neighbouring perennials and shrubs break the wind and help stems remain upright.

    This is one reason layered planting often needs less obvious staking than isolated specimen plants.

    Reduce the need for staking

    Plants become more prone to collapse when grown in excessive shade or very rich conditions. If a perennial repeatedly becomes taller than expected, check whether its position suits it.

    A plant that needs a complex framework every year may simply be in the wrong place.

    The Chelsea chop

    Some late-flowering perennials can be cut back partially in late spring to produce shorter, bushier growth and later flowers. This technique is often known as the Chelsea chop.

    It is not suitable for every perennial. Check the response of the particular plant before cutting valuable growth.

    Remove supports at the end of the season

    Once plants are cut down or have collapsed naturally, collect reusable supports, clean them where necessary and store them dry.

    Leaving metal grids hidden in bare borders can create a trip hazard during winter work.

    Good staking preserves the plant’s character

    The aim is not to make every stem perfectly vertical. A good support prevents destructive collapse while allowing enough movement for the plant to retain its natural form.

    For border structure, read Planting a garden for the seasons. For summer tools, see A few useful tools for summer gardening.

  • Powdery mildew: causes, prevention and treatment

    Powdery mildew: causes, prevention and treatment

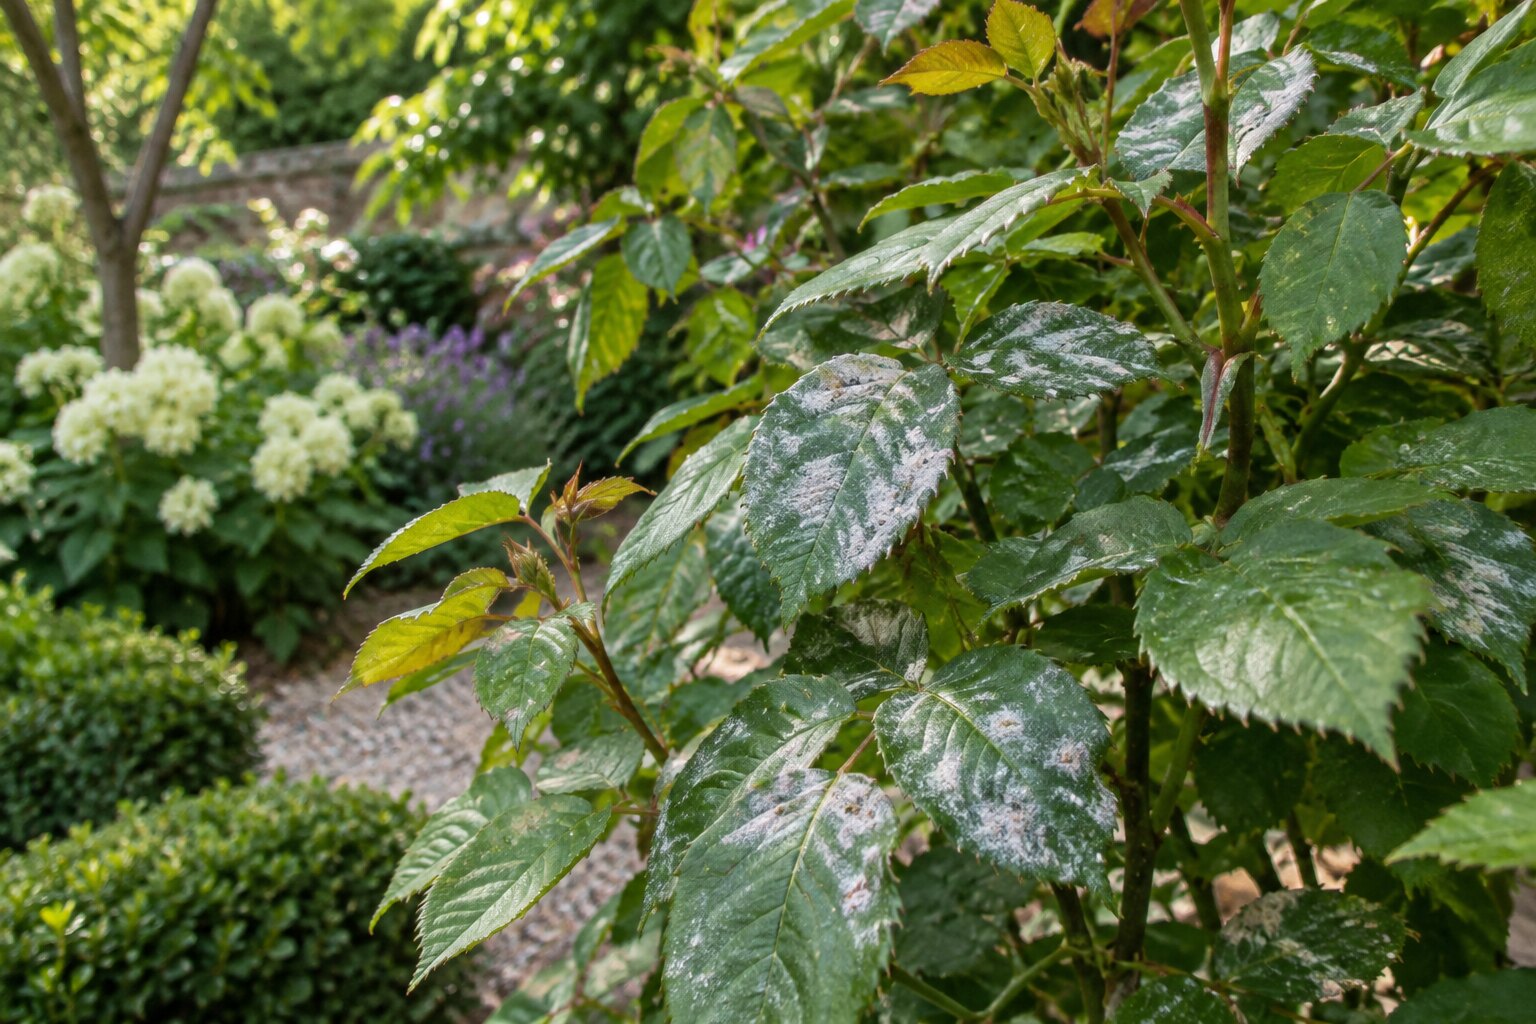
    Powdery mildew is a group of fungal diseases that produce a pale, powder-like coating on leaves and stems. It is common on many ornamental plants, vegetables and fruit crops, particularly later in the growing season.

    It rarely appears for one simple reason. Plant stress, crowded growth, dry roots, poor airflow and susceptible varieties can all contribute to the conditions in which mildew becomes noticeable.

    What does powdery mildew look like?

    The most obvious symptom is a white or grey powdery coating, often beginning as isolated patches on leaf surfaces. These patches can expand until a large part of the leaf appears covered.

    Heavily affected leaves may become distorted, discoloured or die prematurely.

    Powdery mildew is not one single fungus

    Different powdery mildew fungi affect different groups of plants. A mildew on one species does not automatically mean every plant nearby will develop the same disease.

    This is useful because management should focus on the affected plant and its growing conditions rather than treating the entire garden indiscriminately.

    Why dry roots can make mildew worse

    Powdery mildew often becomes conspicuous during warm, relatively dry periods. Plants suffering repeated drought stress can become more susceptible.

    Water deeply when needed so the root zone is adequately moist. Frequent superficial sprinkling encourages shallow roots and does little to help a plant through prolonged dry weather.

    Improve airflow

    Dense crowded growth creates a sheltered microclimate around leaves. Thin badly congested stems where appropriate and give plants enough space to develop.

    Do not prune indiscriminately simply to create airflow. The correct pruning method still depends on the plant.

    Water the soil rather than repeatedly wetting foliage

    Powdery mildew does not require continuously wet leaves in the same way some other fungal diseases do. Watering the root zone is still generally the most efficient way to support the plant and avoid wasting water.

    Remove badly affected material

    Where only a limited amount of growth is heavily affected, remove those leaves or shoots if the plant can tolerate it. Do not strip a plant of most of its foliage in an attempt to remove every visible patch.

    Clear heavily infected fallen leaves where appropriate rather than leaving large amounts of diseased material immediately below the plant.

    Avoid excessive nitrogen

    Very lush, soft growth can be more vulnerable to disease. Feed plants according to need rather than pushing them with repeated high-nitrogen applications.

    Choose resistant varieties where mildew is persistent

    Where the same plant suffers badly every year despite reasonable growing conditions, replacing it with a more resistant variety may be more effective than treating the disease repeatedly.

    This is especially useful in edible crops or ornamental groups where breeders have developed varieties with better resistance.

    Should you use a fungicide?

    Good growing conditions, appropriate watering and resistant varieties are the first line of management. Where a fungicide is considered necessary, use only a currently authorised product for the plant and disease in your location and follow the label exactly.

    Do not assume that repeated preventative spraying is automatically the best solution.

    What happens at the end of the season?

    Annual or deciduous foliage will eventually be removed naturally or during seasonal garden care. Clearing heavily diseased material can reduce the amount of infected debris around the plant, although spores may also arrive from elsewhere in future seasons.

    Think about the plant before the disease

    A little mildew late in the season on an otherwise healthy established plant may be largely cosmetic. A severe recurring infection on a stressed plant is more useful as a sign that the growing conditions, variety or maintenance need attention.

    For drought management, read Watering the garden in dry weather. For seasonal clean-up, see Preparing the garden for winter.
  • Black spot on roses: what actually helps

    Black spot on roses: what actually helps

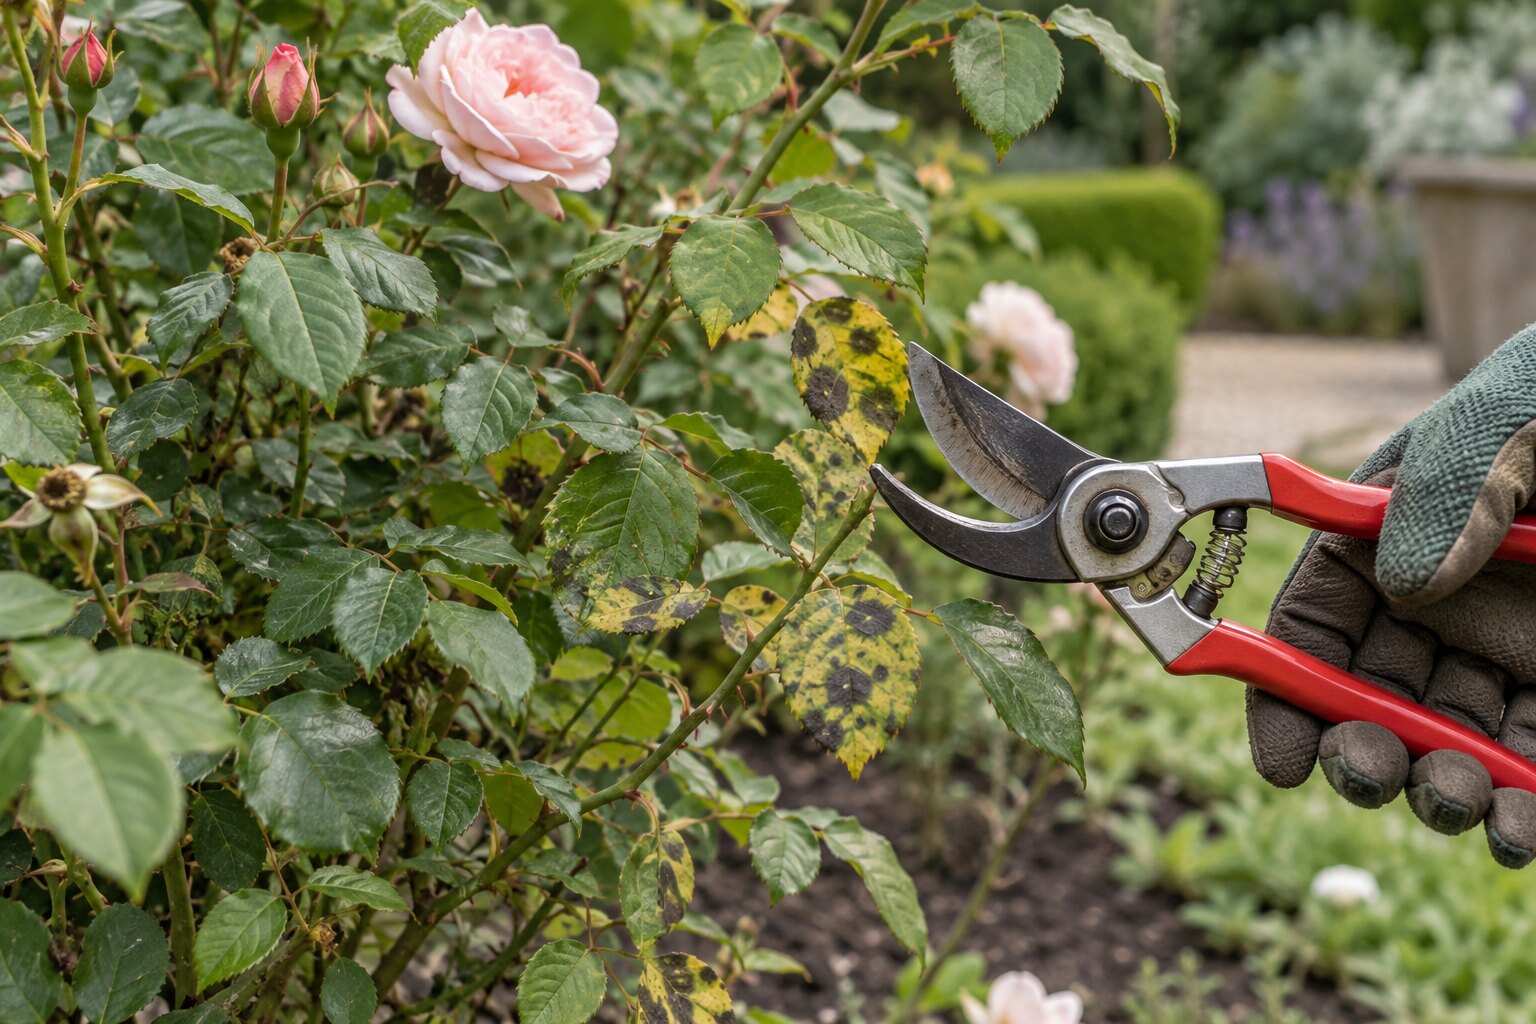
    Black spot is one of the most common diseases of garden roses. Dark spots develop on leaves, often surrounded by yellowing tissue, and badly affected plants can lose a large proportion of their foliage during summer.

    The aim of management is not necessarily to produce a rose with no marked leaf at all. It is to reduce repeated heavy infection so the plant keeps enough healthy foliage to grow and flower well.

    Recognising black spot

    Typical symptoms are irregular dark purple-black spots on leaves. The surrounding leaf tissue often turns yellow, and leaves may fall prematurely.

    Symptoms often begin on lower foliage and become more obvious as the season progresses.

    Why some roses suffer more than others

    Rose varieties differ greatly in their resistance. Some remain relatively clean in ordinary garden conditions while others become heavily affected every year.

    Growing conditions matter too. Dense planting, a sheltered humid position and stressed plants can all make disease management more difficult.

    1. Remove badly affected leaves

    Where practical, remove heavily infected leaves from the plant. Do not remove so much foliage that an already weak rose is left almost bare purely for cosmetic reasons.

    2. Clear fallen rose leaves

    Infected fallen leaves can contribute to disease carrying over around the plant. Collecting heavily affected rose foliage from beneath the plant is a sensible part of seasonal hygiene.

    This is particularly useful in autumn when a large amount of leaf material accumulates under established roses.

    3. Improve the structure of the rose

    Congested plants remain damp for longer and are harder to inspect. Appropriate pruning can open the framework and improve airflow through the plant.

    Pruning technique depends on rose type, so do not simply remove random stems during the growing season.

    4. Water at soil level

    During dry periods, water the root zone deeply rather than repeatedly wetting the foliage. Splashing water can help move fungal spores between leaves, and wet foliage can remain damp for longer in poorly ventilated positions.

    Good soil moisture also helps the rose maintain stronger growth and replace lost foliage.

    5. Mulch around the rose

    A suitable organic mulch can help moderate soil moisture and reduce the amount of soil splash reaching lower leaves.

    Keep mulch away from direct contact with stems and the crown.

    Avoid overfeeding

    A rose repeatedly pushed into very soft growth is not necessarily a healthier rose. Feed according to the needs of the plant and avoid assuming that strong fertiliser applications will compensate for disease.

    Choose resistant roses for new planting

    Variety selection is one of the most effective long-term tools. If you are planting new roses, consider disease resistance alongside flower colour, fragrance and mature size.

    A rose that remains healthy with modest care is usually more rewarding than one that needs repeated treatment to retain its leaves.

    Do fungicides solve black spot?

    Fungicides may be available for black spot in some regions, but they are not a substitute for good plant choice and growing conditions. Products and legal approvals change over time.

    If a fungicide is used, choose only one currently authorised for roses and black spot in your location and follow the label exactly.

    Should a badly affected rose be replaced?

    If the same rose loses most of its leaves every year despite appropriate care, replacement can be reasonable. Modern disease-resistant varieties can provide a similar garden effect with much less intervention.

    Manage the whole plant

    Black spot management works best when several small measures are combined: good variety choice, sensible pruning, reliable soil moisture, hygiene and appropriate spacing. No single action is likely to keep a highly susceptible rose completely clear in a bad disease year.

    For watering advice, see Watering the garden in dry weather. For plant selection, read Choosing plants for a sunny border.

  • How to sow seeds indoors for spring

    How to sow seeds indoors for spring

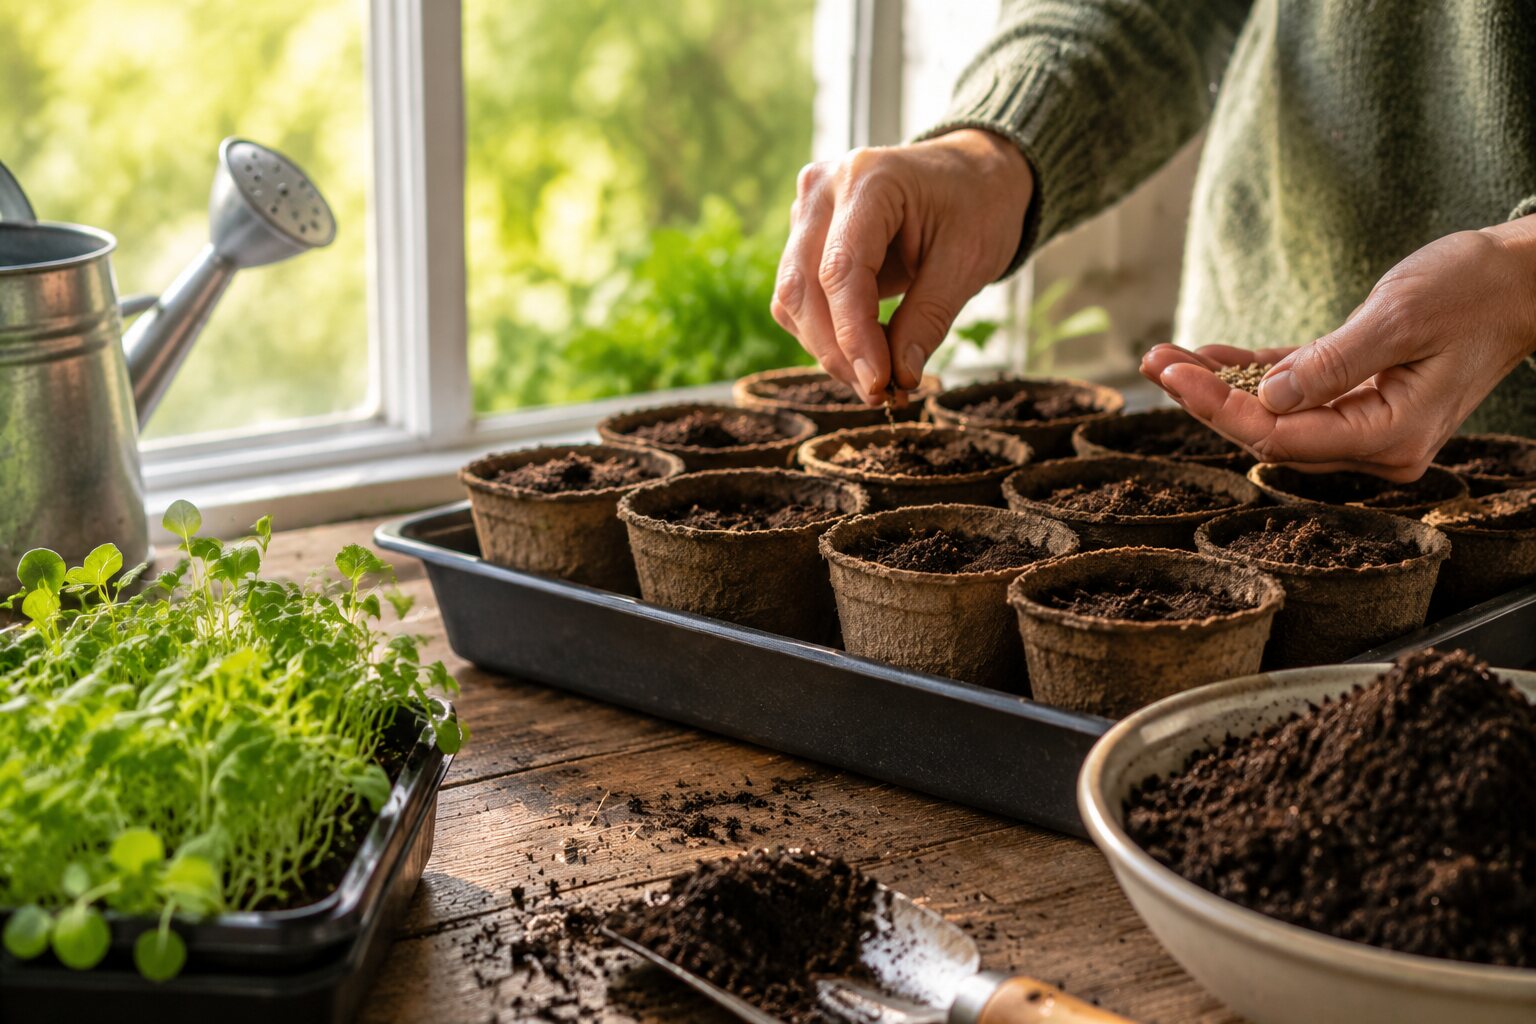
    Sowing seeds indoors is one of the simplest ways to give the growing season a useful head start. It allows tender or slow-growing plants to begin in controlled conditions while the garden outside is still cold, wet or unpredictable. The aim, however, is not simply to sow as early as possible. Strong seedlings come from getting timing, light, temperature and watering in balance.

    Start with timing, not the seed tray

    Before opening a packet of seed, check when the plant can realistically move outside. A seedling sown too early may spend weeks indoors after it has outgrown the space available to it. That often produces stretched stems, crowded roots and plants that are more difficult to establish later.

    Work backwards from the likely planting-out date. Tender plants generally need to wait until the risk of damaging frost has passed, while hardier crops and flowers can move outside sooner. The seed packet remains useful, but local conditions matter too: spring arrives at different speeds in different gardens.

    What you need

    • Clean seed trays, modules or small pots with drainage holes
    • A fine, peat-free seed or multipurpose compost
    • A watering can with a fine rose, or a tray for watering from below
    • Labels and a waterproof pencil
    • A bright windowsill, greenhouse or other well-lit position
    • Optional clear lids or propagation covers for seeds that benefit from steady humidity

    Good seed compost should hold enough moisture for germination without remaining saturated. A very rich compost is unnecessary at this stage: the seed contains much of the energy needed for its first growth.

    1. Fill the container without compacting it

    Fill trays or modules with moist compost and settle it lightly. Avoid pressing it into a dense block. Roots develop better where the compost contains a useful balance of moisture and air.

    Level the surface so that water does not collect in depressions. For very small seeds, a relatively fine surface makes even sowing easier.

    2. Sow at the right depth

    A useful general rule is that larger seeds are covered by roughly their own depth or a little more, while very fine seeds may need only the lightest covering. Some seeds require light to germinate and are best left on the surface. The packet instructions take priority where a plant has particular requirements.

    Do not sow more densely simply because the seed is small. Crowded seedlings compete for light and airflow almost immediately. In modules, one or two seeds per cell often makes later handling much easier.

    3. Water gently

    Watering can undo careful sowing in seconds if a heavy stream displaces the seed. Use a fine rose or stand the container briefly in shallow water and allow moisture to rise through the drainage holes. The compost should be evenly damp rather than waterlogged.

    4. Give seeds the temperature they need

    Different plants germinate at different temperatures. Many common garden plants germinate comfortably in normal indoor warmth, while some prefer cooler conditions. A propagator can be useful for genuinely warmth-loving plants, but unnecessary heat can also produce rapid, weak growth.

    Once germination begins, light becomes especially important. Remove opaque covers and move seedlings to the brightest suitable position.

    Light is usually the limiting factor

    Seedlings leaning strongly towards a window or developing long, pale stems are asking for more light. Rotate trays regularly if light comes mainly from one direction. A cool but very bright place is often better than a warm, dim room.

    Keep young plants away from hot radiators. Warmth accelerates growth, and without equally strong light the result is often soft, elongated seedlings.

    Pricking out and potting on

    Seedlings sown together in a tray usually need separating once they are large enough to handle. Their first leaves are seed leaves; the leaves that follow begin to show the shape of the mature plant. Once true leaves are developing, seedlings can normally be moved carefully into individual modules or pots.

    Handle small seedlings by a leaf rather than squeezing the delicate stem. Make a hole in fresh compost, lower the roots into it and firm very gently around the plant. Water afterwards to settle the compost around the roots.

    Do not skip hardening off

    Plants raised indoors have not experienced outdoor wind, stronger sunlight or large temperature changes. Moving them straight from a protected room to the garden can check their growth badly.

    Introduce plants gradually to outdoor conditions over roughly a week or two. Begin with sheltered periods outside during mild weather, bring them back under cover when necessary, then progressively increase their exposure.

    Common problems

    • Seedlings are tall and weak: increase light and, if possible, reduce excessive warmth.
    • Compost remains constantly wet: improve drainage and allow the surface to begin drying between waterings.
    • Seeds do not germinate: check temperature, moisture, sowing depth and the expected germination time before giving up.
    • Seedlings collapse at soil level: overcrowding, poor airflow and excessive moisture can encourage damping-off problems.

    A better approach to early sowing

    The strongest spring seedlings are not necessarily the earliest ones. They are the plants that reach outdoor conditions at the right size, with compact growth and healthy roots. Sow in manageable batches, label everything and keep notes on what worked. Within a few seasons, the best sowing dates for your own garden become much clearer.

    For more on growing conditions, see Peat-free compost in the garden and Planting a garden for the seasons.

  • Why are my plant leaves turning yellow?

    Why are my plant leaves turning yellow?

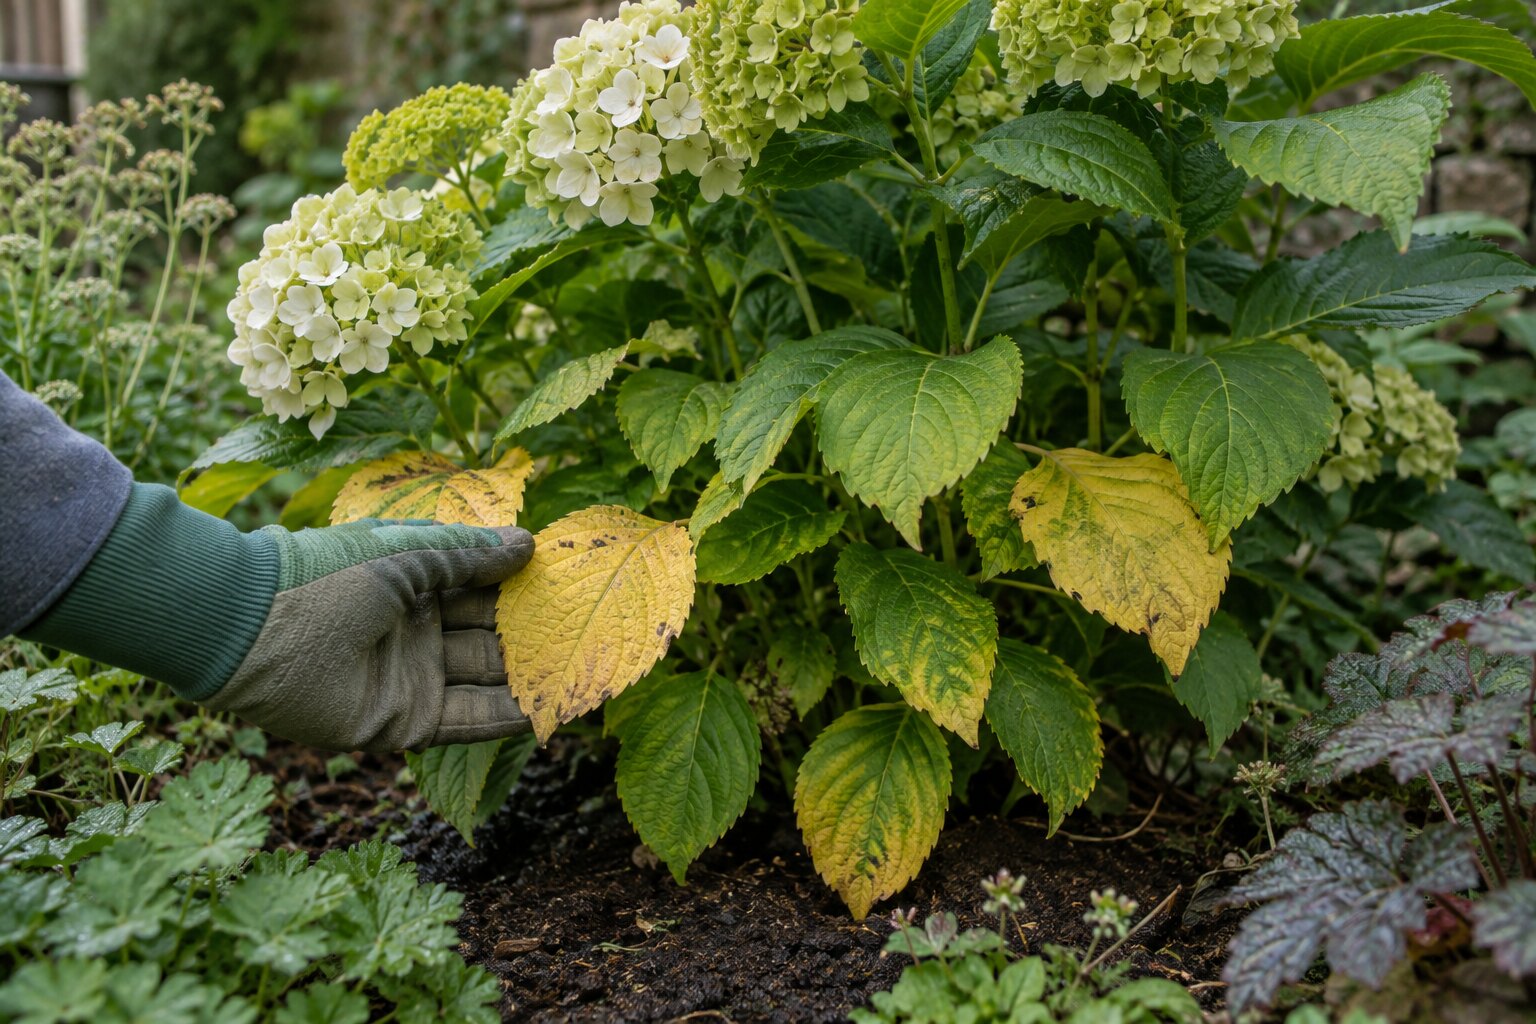
    Yellow leaves are a symptom, not a diagnosis. Plants lose their green colour for many reasons, from completely normal ageing to root damage, drought, waterlogging, nutrient problems or disease.

    The fastest way to make a wrong diagnosis is to see a yellow leaf and immediately add fertiliser. Instead, look at where the yellowing occurs, how quickly it developed and what changed around the plant recently.

    First ask: which leaves are yellow?

    Older lower leaves yellowing slowly can be part of normal leaf ageing, particularly as a plant redirects resources into new growth or towards the end of its season.

    Yellowing on the newest leaves, by contrast, may suggest a different problem involving nutrient availability, root conditions or active growth.

    Look at the pattern

    Uniform yellowing across the whole leaf suggests something different from green veins surrounded by pale tissue, scorched leaf edges or irregular yellow patches.

    Take a moment to compare several leaves rather than focusing on one damaged example.

    Check soil moisture before anything else

    Both drought and waterlogging can cause leaves to yellow because roots are unable to supply the plant normally.

    Push a finger into container compost or inspect the soil around garden plants. Do not judge moisture only by looking at the surface.

    Yellow leaves and overwatering

    Roots need oxygen as well as water. Constantly saturated compost can suffocate roots and encourage decay. The plant may wilt even though the compost is wet because damaged roots can no longer move water effectively.

    In pots, check that drainage holes are open and that the container is not standing permanently in water.

    Yellow leaves and drought

    A plant repeatedly allowed to dry severely may shed older leaves to reduce water loss. Containers are especially vulnerable because a limited compost volume can dry rapidly in sun or wind.

    Water deeply enough to moisten the root zone rather than giving frequent tiny amounts.

    Could the plant be hungry?

    Nutrient shortage is possible, particularly in containers where nutrients are gradually washed out or used by the plant. But deficiency should not be assumed before checking moisture and roots.

    Feed according to the plant, season and growing medium. Too much fertiliser can damage roots and create a new problem.

    Soil pH can affect nutrient availability

    Some plants struggle to absorb particular nutrients when grown in soil with an unsuitable pH, even if those nutrients are technically present.

    Acid-loving plants grown in strongly alkaline conditions are a common example. In a persistent unexplained case, a soil test can be more useful than guessing.

    Check the roots

    A root-bound container plant may have used most of the available compost and water very quickly. Lift the root ball where practical and see whether roots are circling densely around the pot.

    Also look for dark, soft or foul-smelling roots that may indicate prolonged waterlogging or decay.

    Pests and diseases

    Some insects, mites and diseases cause yellowing or mottling. Inspect both sides of the leaves, stems and growing tips.

    Do not attribute every yellow leaf to disease unless there are additional symptoms that support the diagnosis.

    Has the weather changed?

    Cold nights, heatwaves, strong wind and sudden changes in light can all produce temporary leaf damage. A recently planted specimen may also yellow while its root system is adjusting.

    A simple diagnostic order

    • Check whether the yellowing is normal seasonal ageing.
    • Check soil or compost moisture.
    • Inspect drainage and the roots.
    • Consider recent heat, cold or transplant stress.
    • Inspect for pests and disease symptoms.
    • Only then assess feeding and nutrient availability.

    Treat the cause, not the colour

    Once a leaf has turned fully yellow, it will often not become green again. Success should therefore be judged by the new growth that follows after the underlying problem is corrected.

    For moisture management, read Watering the garden in dry weather. For compost and growing media, see Peat-free compost in the garden.

  • How to sow hardy annuals in autumn

    How to sow hardy annuals in autumn

    Some of the easiest flowers in a garden are also among the best candidates for autumn sowing. Hardy annuals complete their life cycle in a single year but can tolerate cooler conditions than tender annuals. Sown at the right time, they begin developing before winter, pause when conditions become difficult and resume growth early in spring.

    The reward can be earlier flowers, stronger plants and less pressure during the busiest weeks of spring. Autumn sowing is not suitable for every annual or every garden, but where soil drains reasonably well it is a useful technique to add to the growing calendar.

    Which annuals suit autumn sowing?

    Look for genuinely hardy annuals rather than tender summer plants. Common candidates include cornflowers, calendula, nigella, larkspur and some poppies. Sweet peas are also frequently started in the cooler part of the year, although their cultivation is slightly different from direct-sown annual flowers.

    Seed packets often indicate whether autumn sowing is recommended. That guidance is worth following because species vary considerably in their tolerance of cold and wet conditions.

    Choose the right place

    Winter wet is often a greater threat to young plants than cold. A free-draining site with reasonable light gives autumn seedlings the best chance. Heavy soil that remains saturated for long periods may be better left for spring sowing, or the seed can be started in modules under light protection instead.

    Clear the site of established weeds before sowing. Young annual seedlings are much easier to manage when they are not competing immediately with perennial weeds or a flush of unwanted seedlings.

    Prepare a fine but firm seedbed

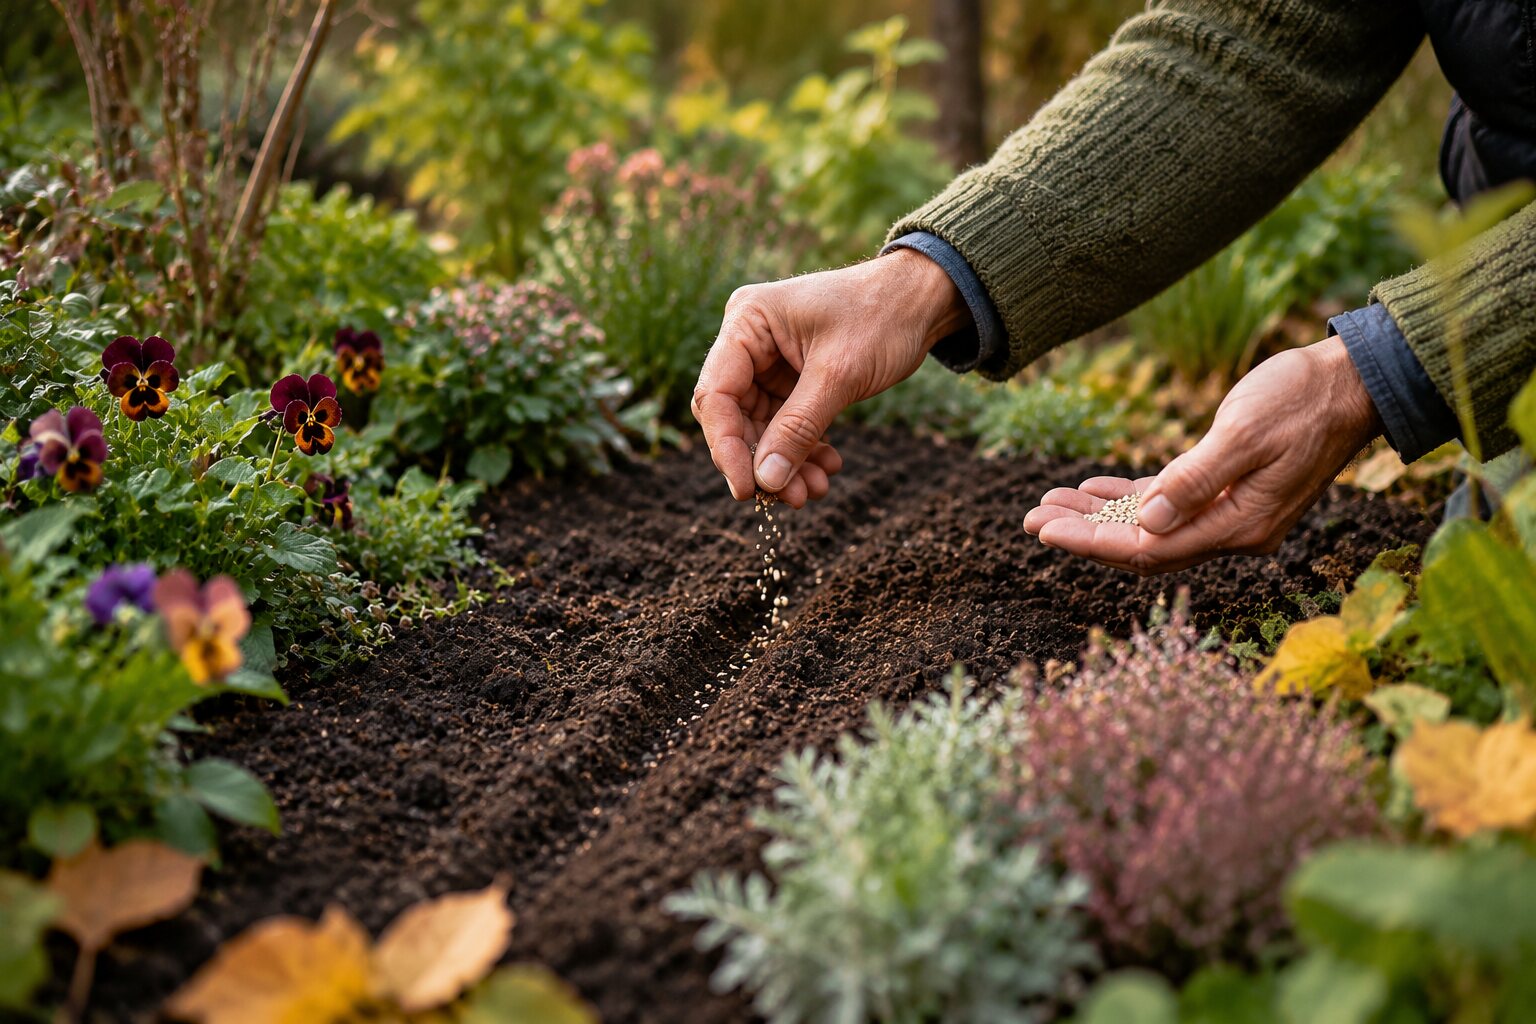
    Loosen only the surface that needs preparation and remove large stones or coarse debris. Break down large clods, then rake the soil level. The aim is not an excessively soft bed but a relatively fine surface with good contact between seed and soil.

    If the soil is very dry, water before sowing rather than trying to soak freshly sown seed afterwards.

    Sowing directly into the border

    For informal planting, seed can be scattered in small drifts. Where you want to distinguish seedlings from weeds more easily, shallow drills are useful. Sow more thinly than instinct suggests. Crowded seedlings usually need thinning later and can become weak if left competing for too long.

    Cover according to the requirements of the species and water gently if the soil needs it. A label is valuable even in an informal border: months later it can prevent you from accidentally removing the plants you deliberately sowed.

    An alternative: sow into modules

    If slugs, winter wet or poor soil make direct sowing unreliable, use modules or small pots. Keep them in a cold frame, unheated greenhouse or another bright, sheltered position. The intention is protection from the worst weather rather than forcing rapid growth with heat.

    Module-raised plants can be set out once conditions are suitable. Avoid allowing them to become root-bound while waiting for the border.

    What happens over winter?

    Some seedlings establish a small rosette and then appear to do very little. That is normal. Growth slows dramatically as temperature and day length fall. Strong autumn-sown plants are not supposed to become large before winter.

    After severe frost, plants may look temporarily flattened or marked. Give them time before assuming they are lost. Hardy annuals can recover surprisingly well once conditions improve.

    Thin early enough

    Where direct-sown seedlings emerge densely, thin them once they can be handled. Leaving enough room between plants encourages branching and allows air to move through the group. The final spacing depends on the species and on whether you want individual specimen plants or a looser drift.

    Spring care

    As active growth resumes, check for weed competition and slug damage. Water only when conditions are genuinely dry. Plants rooted into the border from autumn are often better equipped to find moisture than newly planted spring seedlings.

    Tall species may benefit from discreet support before they begin to lean. Adding support early is usually less conspicuous than trying to rescue mature stems after wind or heavy rain.

    Why autumn sowing sometimes fails

    • The seed was sown too early and produced excessive soft growth before winter.
    • The site remained waterlogged for long periods.
    • Seedlings were lost to slugs or birds soon after emergence.
    • The species was not truly hardy enough for the conditions.
    • Seed was sown too deeply or allowed to dry during germination.

    Use autumn sowing as one part of the plan

    There is no need to choose between autumn and spring sowing. Using both spreads risk and extends the flowering period. Sow a modest amount in autumn, see how it performs in your soil, then make a second sowing in spring. Over time this reveals which plants genuinely benefit from the earlier start in your garden.

    For a wider seasonal approach, read Planting a garden for the seasons.

  • How to deal with waterlogged garden soil

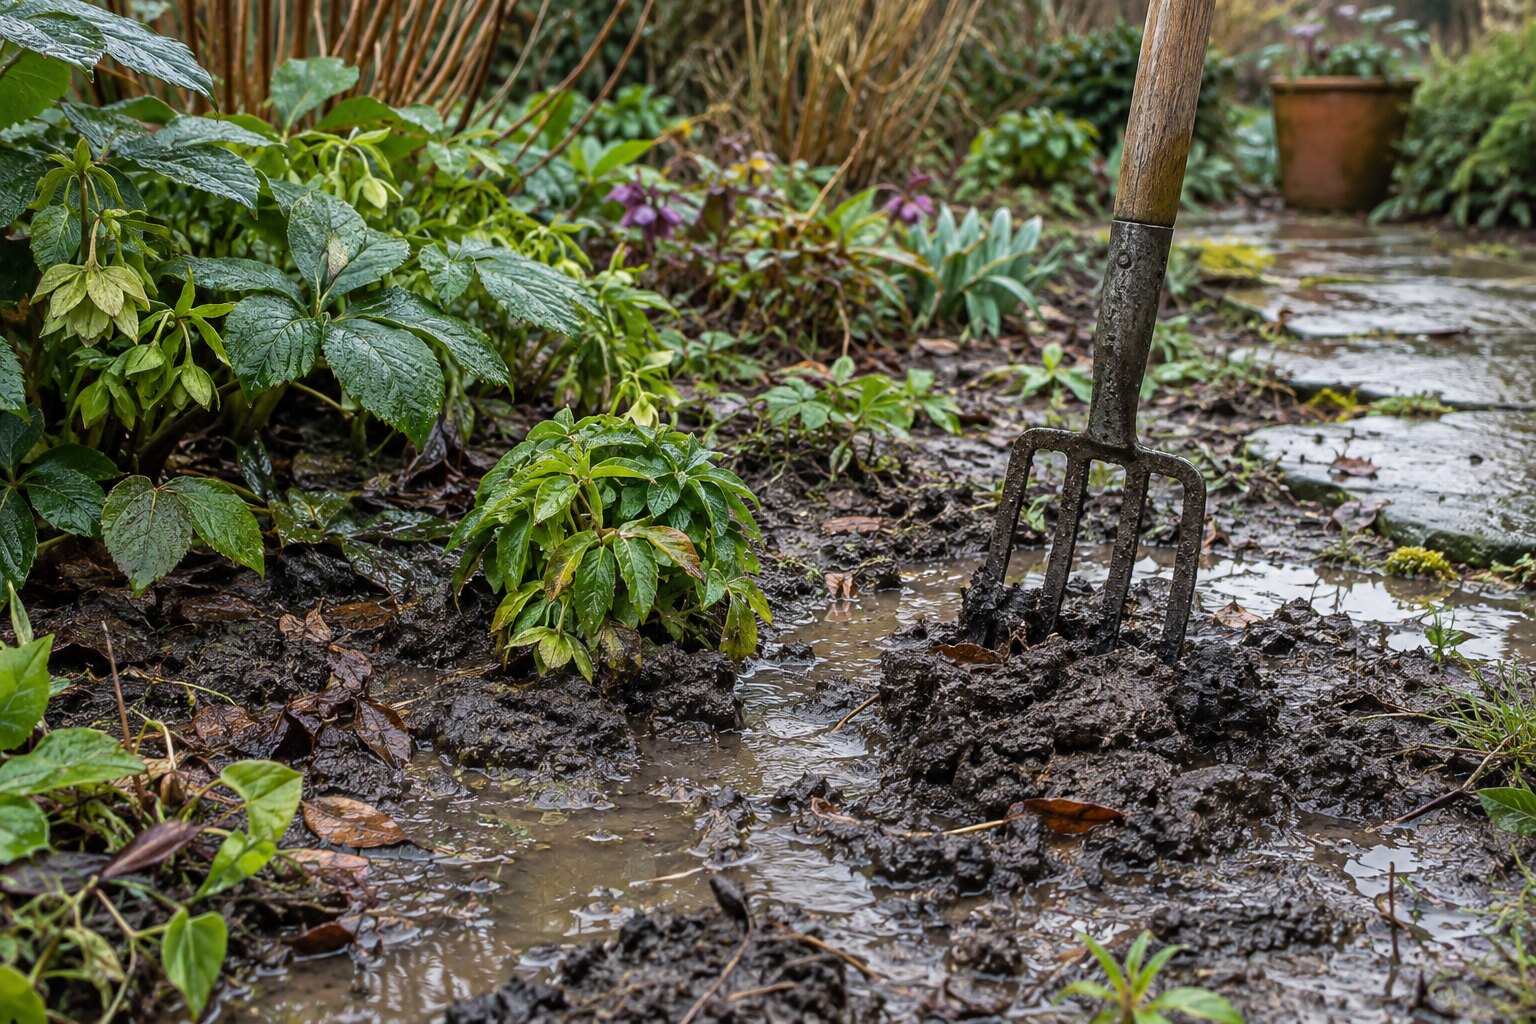
    How to deal with waterlogged garden soil

    Waterlogged soil is more than simply wet soil. When water fills most of the spaces that normally hold air, plant roots can struggle to breathe. If the condition persists, roots weaken or die and plants may become yellow, stunted or unstable.

    The correct solution depends on why the water is present. Heavy soil, compaction, a high water table, a low point in the garden and runoff from surrounding surfaces can all produce similar symptoms.

    Do not start digging while the soil is saturated

    Walking and digging on saturated soil can cause severe compaction and smear the sides of planting holes. This is especially damaging on clay.

    If possible, keep off the affected area until some water has drained and the soil is workable again.

    Work out where the water comes from

    Observe the garden during and after heavy rain. Does water collect in one hollow? Does it run from a paved area or neighbouring higher ground? Is the entire garden saturated or only one bed?

    Understanding the source prevents you from installing a solution in the wrong place.

    Check for compaction

    Construction work, repeated foot traffic and machinery can create compacted layers that slow drainage dramatically.

    Once conditions are suitable, test the soil with a fork or spade. If penetration becomes suddenly difficult at a consistent depth, a compacted layer may be part of the problem.

    Improve soil structure gradually

    Organic matter can improve the structure of heavy soils over time. Mulching with suitable compost or leaf mould encourages biological activity and better aggregation.

    Do not expect one application to transform a persistently wet site. Soil improvement is cumulative.

    Avoid creating a planting sump

    On heavy soil, a deep planting hole filled with very free-draining compost can behave like a bucket surrounded by less permeable ground. Water may collect around the roots rather than disappear.

    Improve a wider area where possible and keep the planting medium reasonably compatible with the surrounding soil.

    Raised beds can help in the right place

    Raising the root zone above persistently saturated ground can improve conditions for plants that need better drainage. This is particularly useful in kitchen gardens and defined planting areas.

    A raised bed does not remove the underlying water, so it should not block natural drainage or send water towards buildings or neighbouring land.

    Choose plants that tolerate the conditions

    If a site is naturally moisture-retentive, working with the conditions can be more successful than trying to make every part of the garden dry.

    Many plants tolerate moist soils well, while others require sharp drainage. Match the plant to the site rather than repeatedly replacing plants that dislike the conditions.

    When drainage work may be necessary

    Where waterlogging is severe, persistent and caused by site drainage rather than soil structure alone, professional drainage advice may be appropriate.

    Any drain needs a legitimate outlet. Moving water from one part of the garden only to create a problem elsewhere is not a solution.

    Protect vulnerable plants during a wet winter

    Plants in the worst positions may need lifting or moving if their roots are clearly at risk. Container plants should have unobstructed drainage holes and should not sit in permanently full saucers outdoors.

    Signs of root stress

    • Leaves yellow despite the soil being wet.
    • Plants wilt even though water is present.
    • Growth becomes weak and stunted.
    • Roots are dark, soft or decaying.
    • Plants become loose because roots have died.

    Waterlogging is a site problem first

    The most durable solution comes from understanding the movement of water through the garden. Improve compacted soil, protect structure, use organic matter, adapt planting and install drainage only where there is a clear reason and a safe outlet.

    For soil improvement, read A simple guide to garden compost and Peat-free compost in the garden. For winter conditions, see Preparing the garden for winter.
  • How to divide established perennials

    How to divide established perennials

    Dividing established perennials is one of the most useful ways to renew a border without starting again. A mature clump can often be lifted and separated into several vigorous pieces, giving you new plants while improving the performance of the original one.

    Division is particularly valuable when a perennial has become congested, developed a bare centre, produced fewer flowers or simply grown beyond the space intended for it.

    When should perennials be divided?

    For many garden perennials, the best periods are spring as active growth begins or early autumn while soil is still warm enough for roots to establish. Avoid dividing during severe heat, frozen conditions or when soil is saturated.

    A useful principle is to give the divided plant time to make roots before it has to cope with either summer drought or winter extremes.

    Not every perennial wants the same treatment

    Many clump-forming perennials divide readily, but plants with deep taproots, woody crowns or very specific root structures may respond poorly. If you are unsure, check the propagation method recommended for the particular plant before lifting a valuable specimen.

    Prepare the new planting area first

    Do not leave freshly divided plants lying in the sun while you decide where they should go. Prepare the destination before lifting the parent clump. Remove perennial weeds, loosen compacted soil and make sure the area drains reasonably well.

    Where the soil needs improvement, incorporate suitable organic matter into the wider planting area rather than creating a small pocket of completely different material around the roots.

    1. Cut back excessive top growth if necessary

    Large leafy plants are easier to handle when some top growth is removed, particularly in autumn. Do not cut everything automatically: the amount depends on the plant and the season. The goal is simply to reduce damage and moisture loss while you work.

    2. Lift a generous root ball

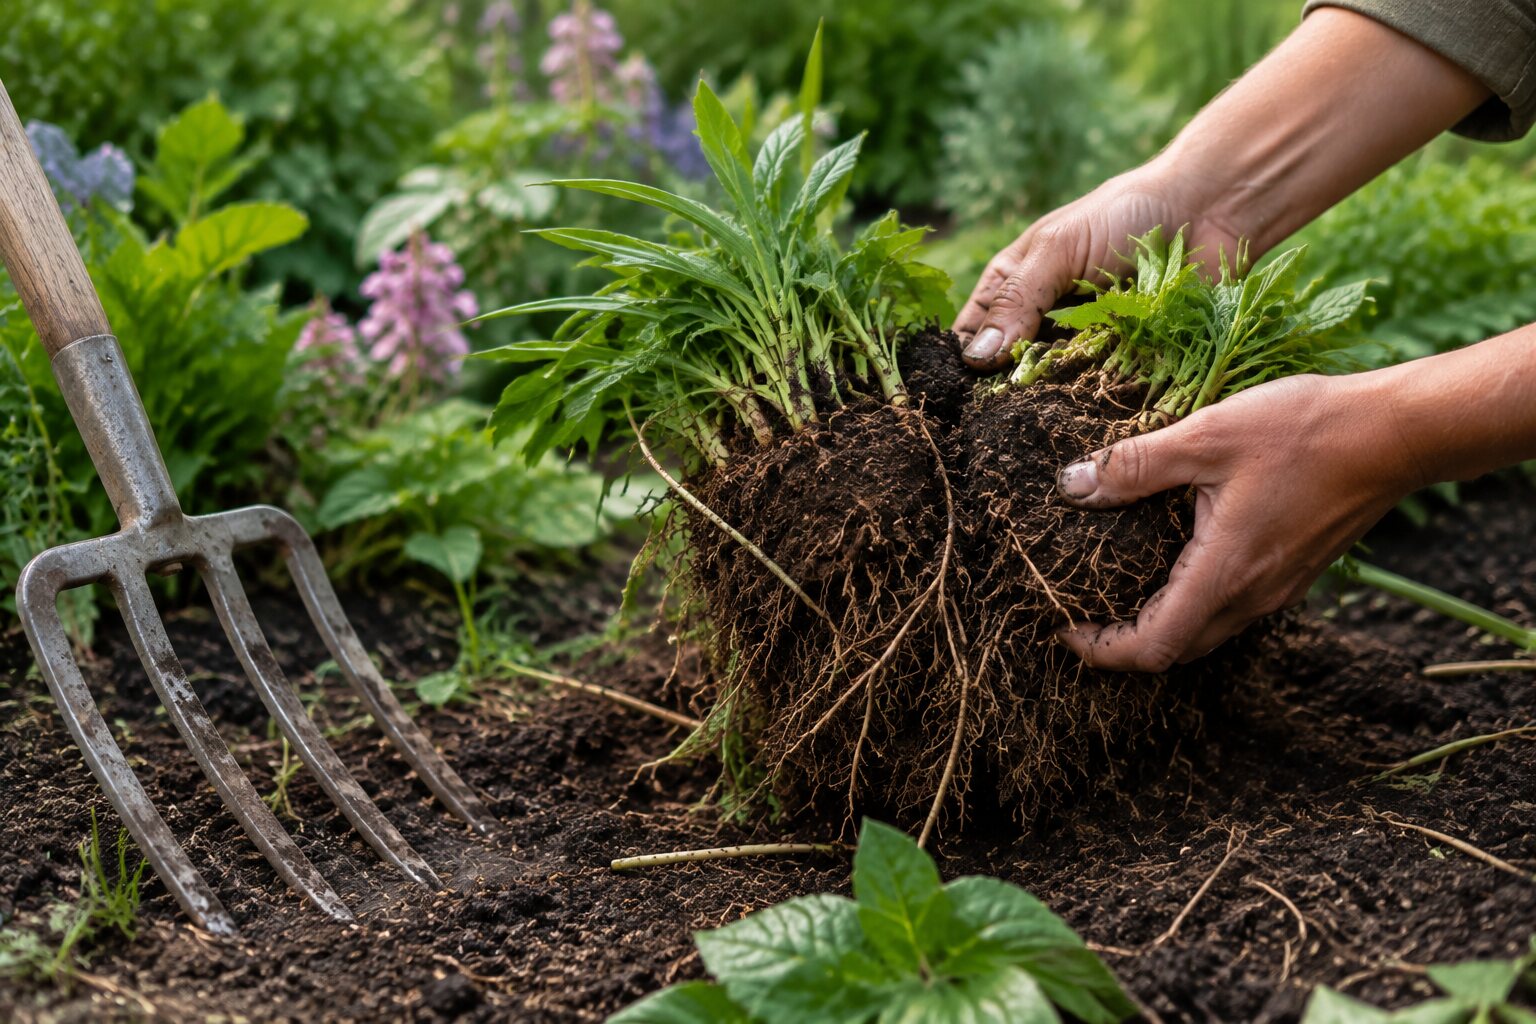
    Work around the clump with a fork or spade, beginning far enough from the crown to avoid cutting through the most useful roots. Loosen the plant from several sides before levering it from the ground.

    For valuable or brittle plants, two garden forks inserted back-to-back can sometimes separate a clump more gently than chopping through it immediately with a spade.

    3. Separate the healthiest sections

    Once lifted, examine the crown. Look for vigorous outer portions with healthy shoots and roots. Old, exhausted or dead material from the centre can usually be discarded.

    Loose-rooted plants may pull apart by hand. Dense crowns may need two forks, a sharp spade or a clean knife. Each new piece needs enough viable root and growing points to re-establish.

    Do not make divisions unnecessarily small

    It is tempting to turn one plant into as many pieces as possible. Very small divisions, however, take longer to recover and may be more vulnerable to drought or competition. Fewer substantial pieces usually establish faster and make a stronger visual impact in the border.

    4. Replant promptly

    Plant divisions at approximately the depth at which they were growing before. Spread roots naturally rather than forcing them into a narrow hole. Firm the soil gently so there are no large air pockets, then water thoroughly.

    If you are replanting part of the original clump in the same position, refresh the surrounding soil and remove exhausted or damaged material before returning the healthy division.

    5. Water during establishment

    Even drought-tolerant mature plants need reliable moisture while rebuilding a root system. Keep an eye on newly divided perennials through dry periods. The aim is consistently adequate moisture, not permanently saturated soil.

    Mulch, but leave the crown clear

    A layer of organic mulch around newly planted divisions can help moderate soil moisture and reduce weed competition. Avoid burying crowns that naturally sit at or near the soil surface.

    Signs that a perennial may need dividing

    • The centre of the clump is dying out while the edges remain vigorous.
    • Flowering has become noticeably weaker.
    • The plant has outgrown its allotted space.
    • Neighbouring plants are being crowded.
    • You want to repeat a successful plant elsewhere in the garden.

    Division is also a design tool

    Repeating a reliable perennial in several places can make a border feel more coherent. Division therefore does more than propagate plants: it lets you edit the planting, strengthen rhythm and redistribute plants towards the conditions where they perform best.

    Before replanting, it is worth revisiting Choosing plants for a sunny border and Planting a garden for the seasons.

  • How to choose a garden trowel

    How to choose a garden trowel

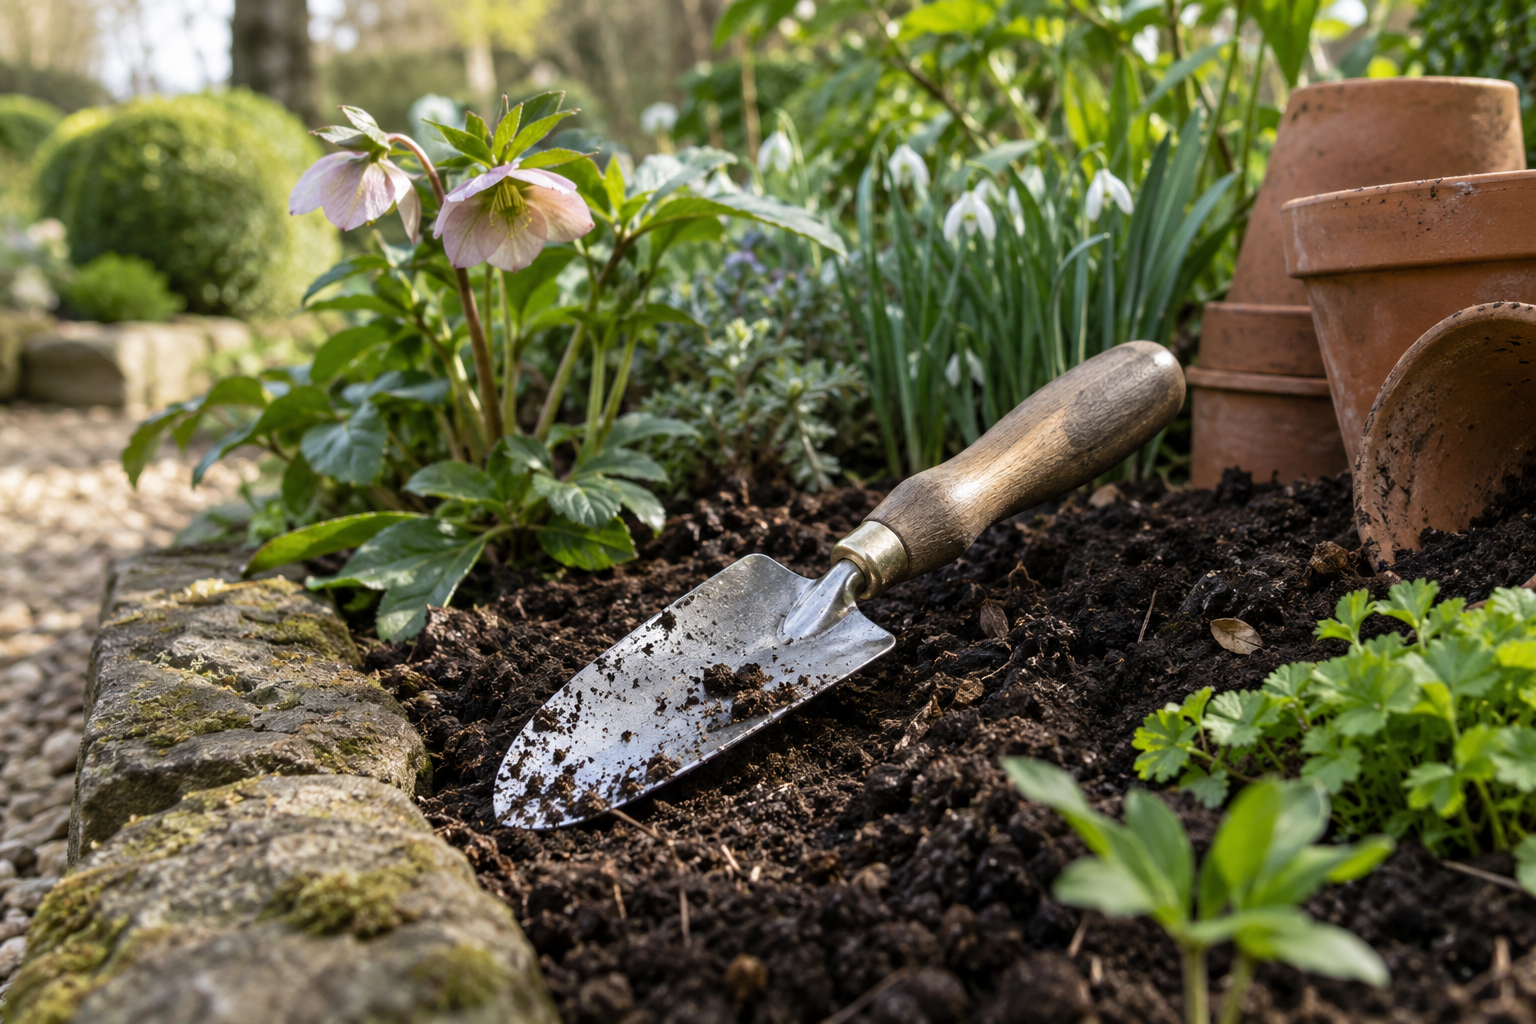
    A garden trowel is one of the simplest tools in the shed, but it is also one of the most frequently used. Planting small perennials, bulbs and bedding plants, filling containers and working compost into a planting hole all put slightly different demands on the same small hand tool.

    A good trowel does not need complicated features. It needs a useful blade shape, enough strength for the soil you garden in and a handle that remains comfortable when the work takes longer than expected.

    Start with the work you actually do

    A wide scoop-shaped trowel is useful for moving compost and making generous planting holes. A narrower blade is easier to place between established plants and can penetrate firmer soil with less resistance.

    If most of your gardening happens in containers, weight and control may matter more than brute strength. If you regularly work in dense clay, rigidity and a strong connection between blade and handle become more important.

    Blade shape

    A traditional pointed blade is versatile because the tip can open soil while the wider section moves a useful amount of material. Very rounded blades scoop well but may be less effective in firm ground.

    Extremely narrow blades are useful for precision planting and weeds, but they are not necessarily the best general-purpose trowel.

    Blade material

    Stainless steel resists corrosion well and is easy to clean. Carbon steel can be extremely strong and take a useful working edge but needs more attention after use because bare steel can rust.

    Thickness alone does not determine strength. The shape of the blade, the quality of the steel and the way the shank is formed all contribute to how the tool behaves under pressure.

    Look closely at the blade-to-handle connection

    This is where cheap hand tools often fail. A thin spot, weak weld or short tang can loosen after repeated levering.

    A trowel intended for demanding soil should have a substantial connection between the blade and handle. Ideally, the tool should feel like one continuous structure rather than two pieces simply attached to each other.

    Handle length and grip

    Very short handles offer control but can require more wrist effort. A slightly longer handle provides useful leverage. Too long, however, and a hand trowel begins to lose the precision that makes it useful.

    Hold the tool before buying where possible. The handle should sit naturally in the hand without sharp edges or an oversized grip forcing the fingers apart.

    Wood or synthetic handles?

    Both can work well. A shaped hardwood handle feels warm and traditional and can last for many years when kept dry and maintained. Modern synthetic handles can be highly durable and need little maintenance.

    The quality of the shape and construction matters more than the material alone.

    Weight is a balance

    A very light trowel can feel pleasant initially but may flex in difficult ground. An unnecessarily heavy one becomes tiring during repetitive planting.

    A good general-purpose tool feels substantial enough to trust without making every planting job harder.

    Depth markings are useful, but secondary

    Some trowels include measurements on the blade for planting depth. These can be convenient for bulbs and young plants, but they should not be the main reason for choosing a tool.

    A strong, comfortable trowel without markings is more useful than a weak one with a ruler printed on it.

    Do not use a trowel as a crowbar

    Even a strong hand tool has limits. Levering large stones, cutting thick woody roots or forcing the blade deep into compacted ground can damage the tool and your wrist.

    Use a fork, spade, root saw or other appropriate tool when the job becomes larger than the trowel.

    A good trowel should become familiar

    The best hand tools often disappear into the work. You stop thinking about the trowel and concentrate on the plant, the soil and the job in front of you. That is a better measure of quality than a long list of features.

    For broader tool care, read Keeping garden tools in good condition. For seasonal tool use, see A few useful tools for summer gardening.

  • How to take softwood cuttings

    How to take softwood cuttings

    Softwood cuttings are a straightforward way to make new plants from fresh young growth. Instead of waiting for seed, you take a short piece of healthy stem from an established plant and encourage it to make its own roots. When successful, the new plant is genetically identical to the parent.

    Late spring and early summer are particularly useful because many plants are producing vigorous new shoots that are mature enough to handle but have not yet become woody.

    What is a softwood cutting?

    Softwood is the fresh, flexible growth produced during the current season. It bends easily and is usually greener and less rigid than older stems. This young material can root quickly, but it also loses moisture rapidly after being removed from the parent plant. That is why careful handling matters.

    Choose the parent plant carefully

    Take material from a healthy, vigorous plant that is not obviously stressed by drought, pests or disease. Choose shoots that are typical of the plant rather than unusually weak or distorted growth.

    Morning can be a good time to collect cuttings because stems are generally well hydrated. If you cannot prepare them immediately, keep them cool and prevent them from drying out.

    What you need

    • Clean, sharp secateurs or a propagation knife
    • Small pots or modules with drainage
    • Fresh peat-free propagation or multipurpose compost
    • A pencil, dibber or similar tool for making planting holes
    • A clear cover or propagator where appropriate
    • Labels

    1. Take more material than you finally need

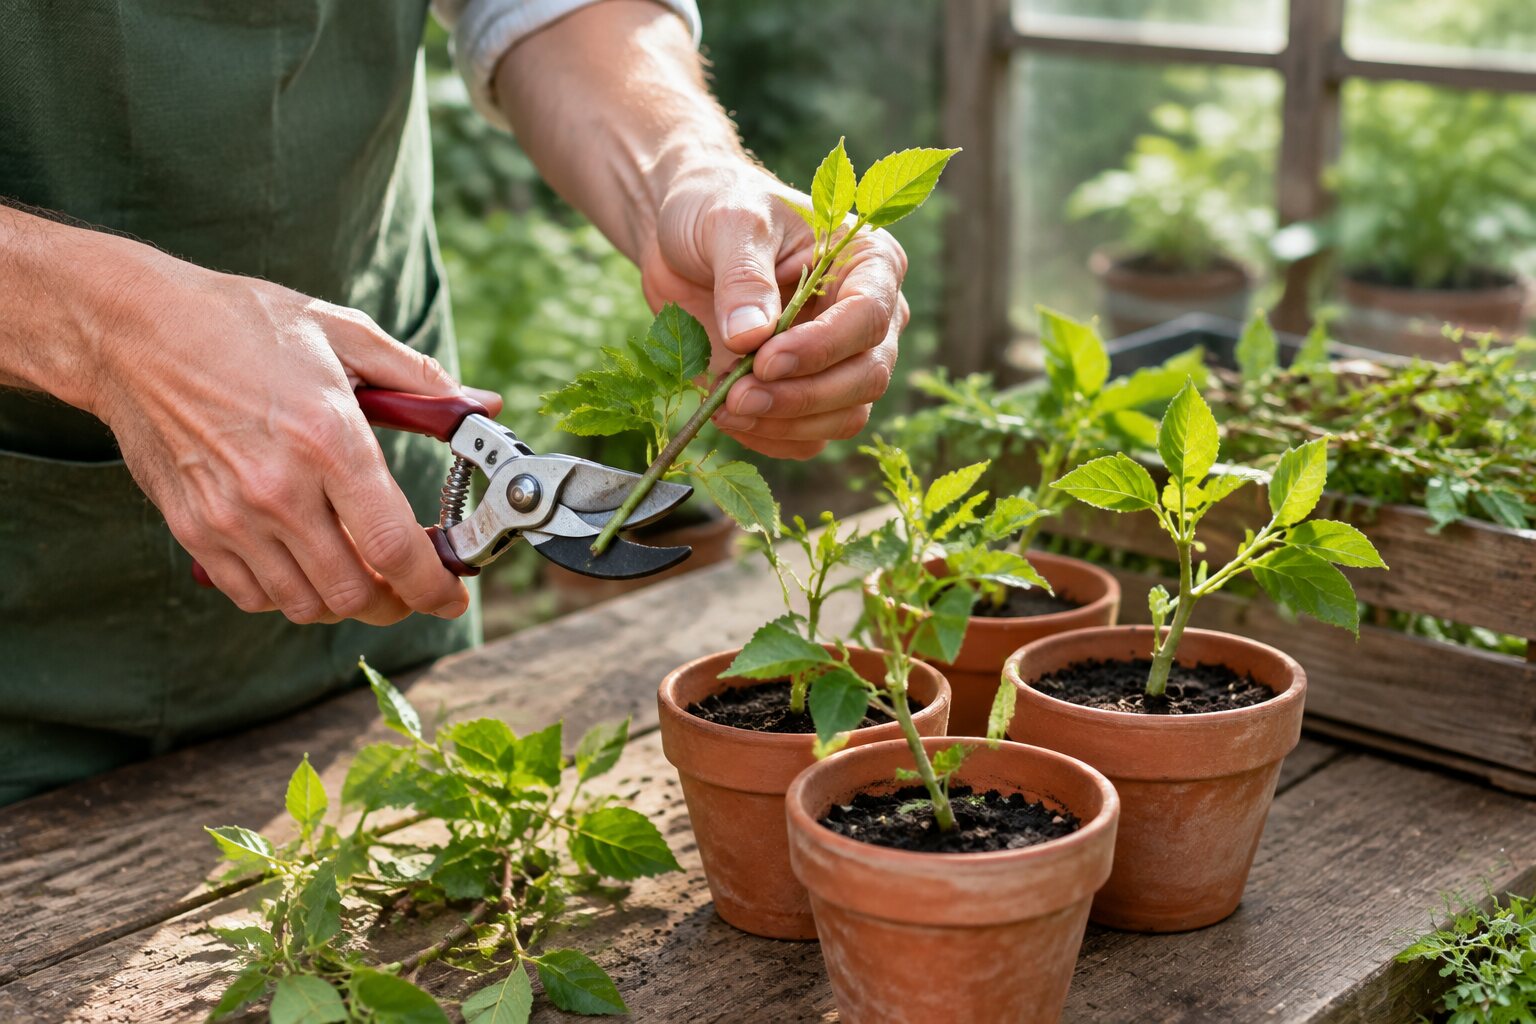
    Cut healthy non-flowering shoots a little longer than the finished cutting. This allows you to make the final cut neatly once you are working at the potting bench.

    If a shoot has begun forming flowers, choose another where possible. Root formation is the priority and a strongly flowering shoot is directing energy elsewhere.

    2. Prepare the cutting

    Trim the base with a clean cut just below a leaf joint or node where appropriate for the plant. Remove the lower leaves so that no foliage will be buried in the compost. Retain enough upper foliage for photosynthesis without leaving such a large leaf area that the cutting loses water excessively.

    Large leaves can sometimes be reduced, but avoid unnecessary cutting unless it genuinely helps manage moisture loss.

    3. Insert into moist compost

    Fill a pot with moist compost and make planting holes around the edge with a dibber. Insert each cutting carefully so the prepared lower stem is in contact with the compost. Firm lightly around it.

    Several cuttings can share a pot as long as their leaves are not tightly crowded together. Good airflow becomes increasingly important as they begin to grow.

    4. Reduce water loss without creating stagnant conditions

    A clear propagator lid or loose cover helps maintain humidity around cuttings that wilt easily. Keep the cover away from the foliage where possible and provide some ventilation. Constant condensation and stagnant air can encourage rotting.

    Place the pot in bright indirect light. Strong direct sun can overheat a covered pot and dehydrate cuttings surprisingly quickly.

    5. Keep the compost moist, not saturated

    The cutting has no established root system, so drying out is dangerous. At the same time, waterlogged compost reduces air around the base and can encourage decay. Check regularly rather than watering automatically on a fixed schedule.

    How do you know a cutting has rooted?

    Fresh new growth is encouraging, although it is not absolute proof. A very gentle resistance when the cutting is touched can indicate that roots have begun anchoring it. Do not repeatedly pull cuttings from the compost to check progress; that can damage the new roots you are trying to establish.

    Potting rooted cuttings on

    Once a cutting has formed a useful root system, move it into its own small pot with suitable compost. Water after potting and keep it sheltered while it adjusts. Gradually introduce stronger light and outdoor conditions rather than moving a protected cutting directly into an exposed border.

    Why softwood cuttings fail

    • The material dried out between cutting and preparation.
    • Stems were too soft, weak or already stressed.
    • The compost stayed saturated.
    • Covered pots overheated in direct sunlight.
    • Dirty tools or old compost introduced disease.
    • The chosen plant is better propagated by another method.

    Propagation becomes easier with repetition

    Take several cuttings rather than relying on one. Even experienced gardeners expect some losses, and a small batch makes it easier to see which material roots most reliably. Label the pot with the plant and date, and make a note of the results. That turns a simple technique into useful knowledge for future seasons.

    For growing media and establishment, see Peat-free compost in the garden.

  • How to use a garden fork properly

    How to use a garden fork properly

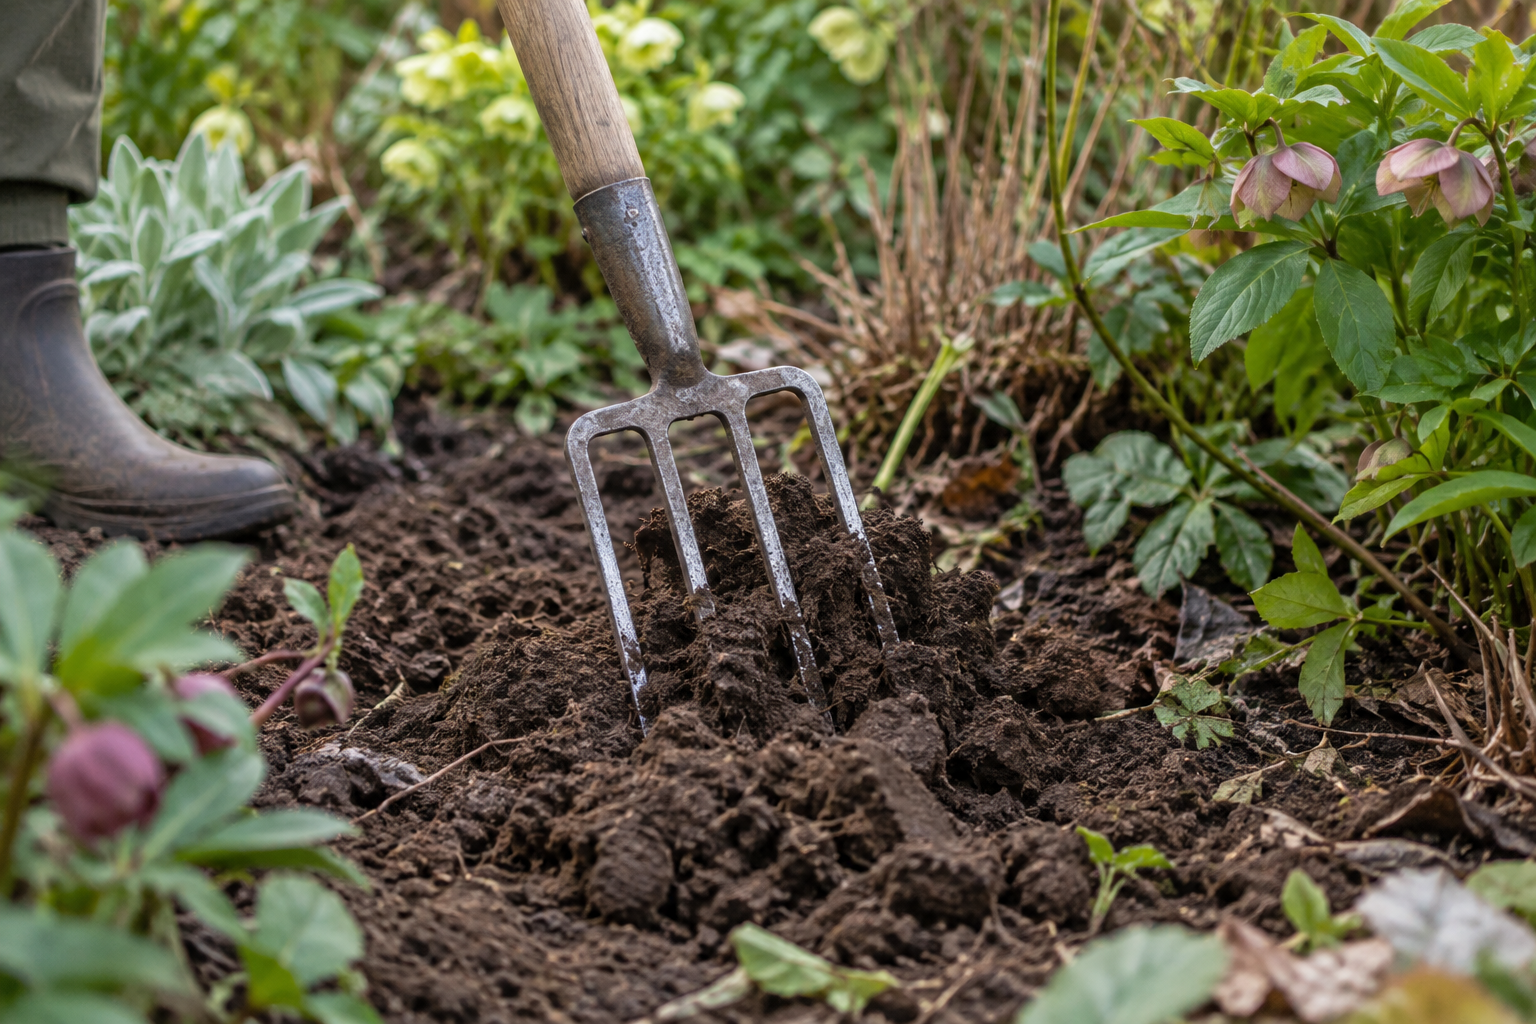
    A garden fork is often treated as a rough digging tool, but its real strength is that it can loosen soil with less cutting and turning than a spade. Used well, it is useful for lifting plants, breaking compacted ground, aerating soil and moving organic material.

    The important part is working with the tines rather than using the handle as a lever beyond what the tool can safely tolerate.

    Garden fork or border fork?

    A full-sized garden fork is suited to larger areas and heavier work. A border fork is smaller and easier to control between established plants.

    If you mainly work in densely planted borders, the smaller tool may be more useful than a large fork that damages neighbouring roots and foliage simply because there is not enough room to use it properly.

    Use your weight, not only your arms

    Place the tines where you want them to enter the soil and use your foot on the tread where the fork provides one. Keep your body balanced and let your weight help push the fork into the ground.

    Repeatedly forcing a fork into resistant ground using only your arms is tiring and increases the temptation to twist the handle excessively.

    Loosening soil without turning it completely

    Insert the tines vertically, then draw the handle back slightly to create cracks and air spaces. Move a short distance and repeat.

    This can loosen compacted ground without completely inverting the soil profile.

    Do not work saturated soil

    Forking very wet clay can do more harm than good. The soil smears and compacts, and foot traffic damages its structure.

    Wait until the ground is moist but workable rather than sticky enough to cling heavily to tools.

    Lifting established plants

    A fork is particularly useful when lifting perennials because the tines can move through soil with less cutting than a spade blade.

    Begin outside the main crown and work around the plant gradually. Loosen the root ball from several sides rather than trying to lever the whole plant out from one position.

    Use two forks for dividing some perennials

    Dense clumps can sometimes be separated with two forks inserted back-to-back into the root mass. Push the handles towards each other so the tines move apart and separate the plant.

    This works best with suitable fibrous-rooted perennials. It is not appropriate for every plant.

    Aerating compacted areas

    On a small lawn, a garden fork can create aeration holes in heavily trafficked areas. Push the tines into the soil at regular intervals and gently ease them back.

    For large lawns or very severe compaction, specialist aeration equipment is more efficient.

    Moving compost and mulch

    A fork is often better than a spade for moving coarse compost, manure and fibrous mulch because the tines enter the material easily.

    Choose the correct fork for the job: a broad manure or compost fork is more efficient for loose material than a narrow digging fork.

    Avoid excessive levering

    If the tines are buried beneath a large stone or thick root, forcing the handle backwards can bend tines or damage the shaft.

    Reposition the fork, loosen the surrounding soil and use an appropriate tool for the obstruction.

    Keep the tines clean

    Soil left packed between the tines holds moisture against the metal. Brush or wash the fork clean after heavy use and let it dry before storage.

    The fork is a soil-reading tool

    Used slowly, a garden fork tells you a great deal about the ground. You feel compacted layers, roots, stones and changes in soil structure through the handle. That feedback helps you work more carefully than simply forcing a blade through everything in the way.

    For improving difficult ground, see A simple guide to garden compost. For tool maintenance, read Keeping garden tools in good condition.