Category: Garden Care

  • How to prune roses

    How to prune roses

    Pruning roses is less complicated than it first appears. The aim is not to cut every rose into the same shape, but to remove weak, damaged and badly placed growth while encouraging a strong framework that can carry healthy new shoots and flowers.

    For many established bush roses, late winter into early spring is the main pruning period. The exact timing depends on climate and rose type, but the useful signal is usually the same: the harshest winter weather is passing and buds are beginning to swell.

    First identify what kind of rose you have

    Hybrid teas, floribundas and many modern shrub roses can generally be pruned during late winter or early spring. Climbing and rambling roses are different and may require another approach because they flower on different types of wood.

    If you do not know the exact variety, look at how the plant grows. A compact bush that produces flowers on fresh shoots is usually treated differently from a large rose trained horizontally along a wall or arch.

    Use clean, sharp tools

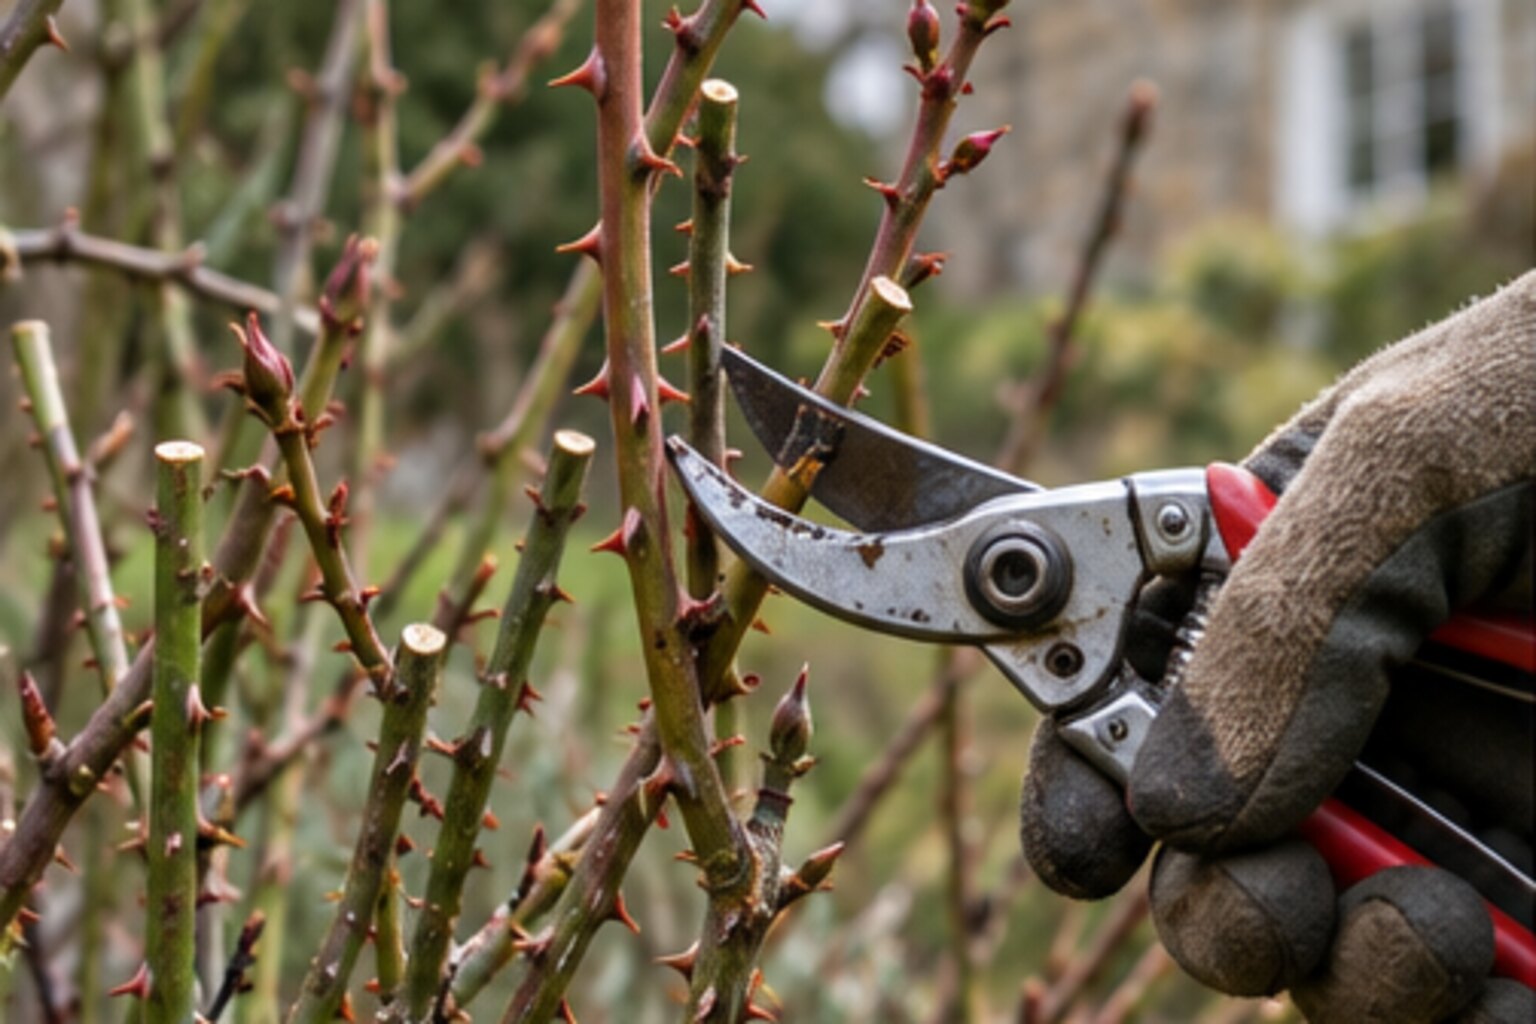
    Good secateurs make pruning easier and leave cleaner cuts. Blunt blades crush stems rather than cutting them cleanly. For thicker stems, use loppers or a pruning saw instead of forcing ordinary secateurs beyond their comfortable capacity.

    Wear gloves and long sleeves when working among thorny stems, particularly on large established plants.

    1. Remove dead, damaged and diseased wood

    Begin with the obvious material. Dead wood often looks dry or discoloured and has no healthy buds. Damaged stems may be split, rubbed or broken. Diseased material should also be removed where appropriate.

    Cut back until the wood appears healthy. Removing this material first makes the remaining structure much easier to read.

    2. Remove crossing and inward-growing stems

    Stems rubbing against each other create wounds and congestion. Where two branches cross, keep the stronger or better-positioned one and remove the other.

    Also look for growth heading directly into the centre of the plant. An open framework improves airflow and makes the final shape easier to maintain.

    3. Remove weak growth

    Very thin, weak stems often contribute little to the final display and can crowd stronger shoots. Removing them allows the plant to direct more energy into a smaller number of useful branches.

    Do not remove every thin stem automatically. Use the overall structure of the rose as the guide.

    4. Shorten the remaining framework

    Once the plant is clean and open, shorten the remaining stems to encourage strong new growth. How hard you prune depends on rose type, age and vigour.

    Strong modern bush roses often tolerate fairly substantial pruning. Older shrub roses and varieties grown mainly for a natural shape may need lighter treatment.

    Where should the cut be made?

    Make the cut slightly above a healthy bud. An outward-facing bud is often chosen because the new shoot then grows away from the centre of the plant.

    A slight slope can help water run away from the bud, but the quality of the cut matters more than achieving a perfect angle. Avoid leaving a long dead stub above the bud, and avoid cutting so close that the bud itself is damaged.

    What about old, thick stems?

    Established roses sometimes benefit from gradual renewal. Removing one of the oldest stems close to the base can encourage fresh basal growth and prevent the framework becoming increasingly woody and congested.

    Do not automatically remove all old wood in one year. Renewal is usually better done progressively.

    After pruning

    Clear away fallen rose leaves and prunings where disease may have been present. Mulching around the plant can help retain soil moisture and improve the surface of the soil, but keep mulch away from direct contact with the stems.

    Where feeding is appropriate, apply it according to the needs of the rose and the product instructions rather than assuming more fertiliser will always produce a better plant.

    Common pruning mistakes

    • Using blunt secateurs that crush stems.
    • Leaving dead or crossing growth because the plant already looks sparse.
    • Pruning every rose type in exactly the same way.
    • Leaving long stubs above buds.
    • Cutting a weak plant extremely hard without considering why it is weak.
    • Ignoring the final shape and concentrating only on individual cuts.

    Pruning is about structure

    A well-pruned rose should not look mechanically symmetrical. It should have a clear framework, space for new growth and enough healthy wood to support the season ahead. Once dead, weak and badly placed stems are removed, the remaining decisions become much simpler.

    For related seasonal work, see Getting ready for spring and Keeping garden tools in good condition.
  • How to prune summer-flowering shrubs

    How to prune summer-flowering shrubs

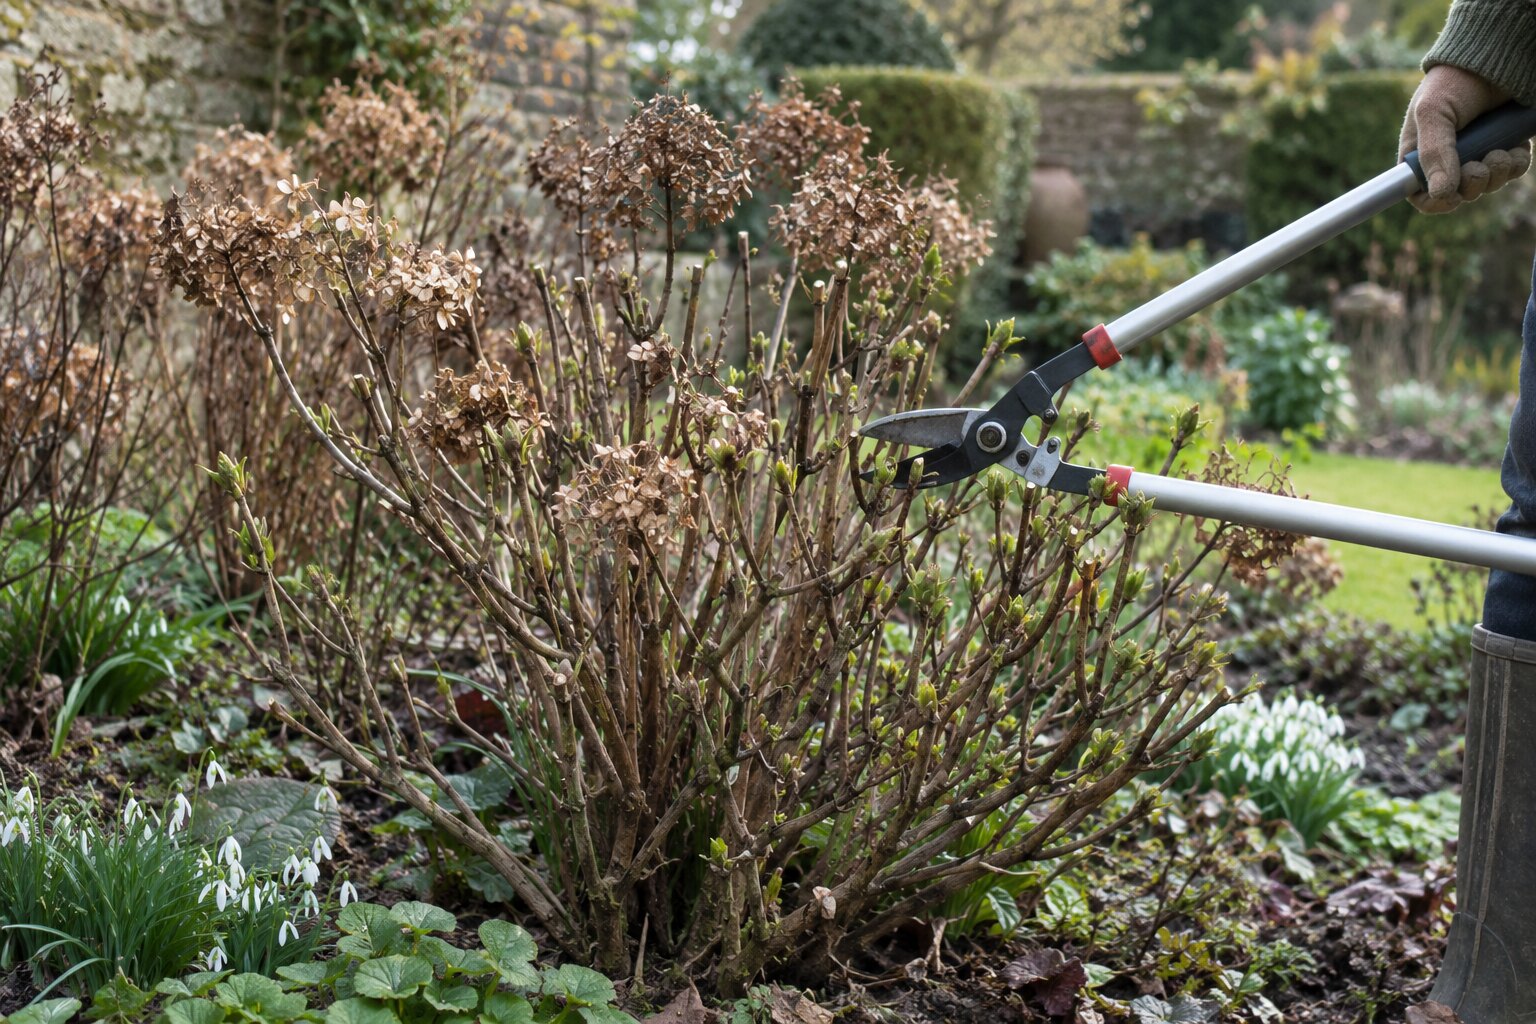
    Many summer-flowering shrubs produce their flowers on new growth made during the current season. For these plants, pruning in late winter or early spring can encourage fresh vigorous shoots that later carry flowers.

    The important word is many. Shrubs flower on different types of wood, and pruning at the wrong time can remove an entire season’s flowers. Before cutting hard, identify whether the plant flowers on new growth or on stems produced the previous year.

    Why timing matters

    A shrub that flowers on new season growth has time to replace pruned stems and form flower buds later in the same year. A spring-flowering shrub often formed its flower buds on older wood months earlier. Pruning that shrub in late winter can remove those buds before they ever open.

    This difference is the foundation of good shrub pruning.

    Start by identifying the plant

    Examples of shrubs commonly pruned in late winter or early spring include certain buddlejas, hardy fuchsias, some hydrangeas and other plants that flower mainly on fresh growth. The correct treatment still depends on species and variety.

    If identification is uncertain, delay severe pruning until you know how the plant flowers. A year of observation is often less damaging than a confident cut made at the wrong time.

    1. Remove damaged and dead wood first

    Winter may leave stems split, dead or badly damaged. Remove these before making decisions about shape. Cut back to healthy material using sharp, clean tools.

    2. Remove badly placed growth

    Branches that rub, cross heavily or grow into neighbouring paths and plants may need removal. Taking out a few entire stems often produces a more natural result than shortening every branch indiscriminately.

    3. Decide how much new growth you want

    Some vigorous summer-flowering shrubs respond well to hard pruning and produce strong new stems from a low framework. Others are better reduced more moderately.

    Consider the mature size and position. A shrub repeatedly cut hard simply because it was planted in too small a space may never look convincing. Pruning cannot permanently solve a poor choice of plant.

    4. Cut to healthy buds or framework

    Where shortening stems, cut just above healthy buds. Where removing a branch completely, cut cleanly at its point of origin rather than leaving a long stub.

    Large branches require the correct saw and technique to avoid tearing bark.

    Renovating an old shrub

    A mature shrub with a congested centre can often be improved by removing some older stems at the base. This allows younger growth to develop and gradually renews the plant.

    For shrubs that do not respond well to drastic renovation, remove old wood over two or three seasons rather than stripping the plant in one operation.

    Do not prune purely for neatness

    A shrub is not a hedge. Cutting every shoot to the same outer surface can create dense twiggy growth and destroy the natural shape of the plant.

    Selective cuts usually produce a better result. Look into the structure and remove or shorten individual branches with a reason.

    Aftercare

    After substantial pruning, check the soil around the root zone. A shrub asked to produce a large amount of new growth will establish that growth more successfully if the soil is not competing heavily with weeds or suffering prolonged drought.

    Mulch can be useful after pruning, particularly on soil that dries rapidly, but do not pile organic matter directly against woody stems.

    The simple rule

    Before pruning any flowering shrub, answer one question: does it flower mainly on new growth or on older stems? Once that is clear, timing and severity become much easier to judge.

    Continue with Getting ready for spring and Planting a garden for the seasons.

  • How to improve heavy clay soil

    How to improve heavy clay soil

    Heavy clay soil can be difficult to work, but it is not poor soil by definition. Clay particles hold nutrients and water well, which can make clay surprisingly fertile. The challenge is structure: when wet it can become sticky and compacted, while during dry weather it may become hard and cracked.

    Improving clay is therefore less about replacing the soil and more about helping it form a better structure over time.

    Do not work clay when it is saturated

    One of the fastest ways to damage clay soil is to dig or walk on it when it is very wet. Pressure squeezes out air spaces and can turn the surface into dense slabs.

    Wait until the soil is moist but no longer sticky enough to smear heavily on tools and boots.

    Organic matter is the main long-term tool

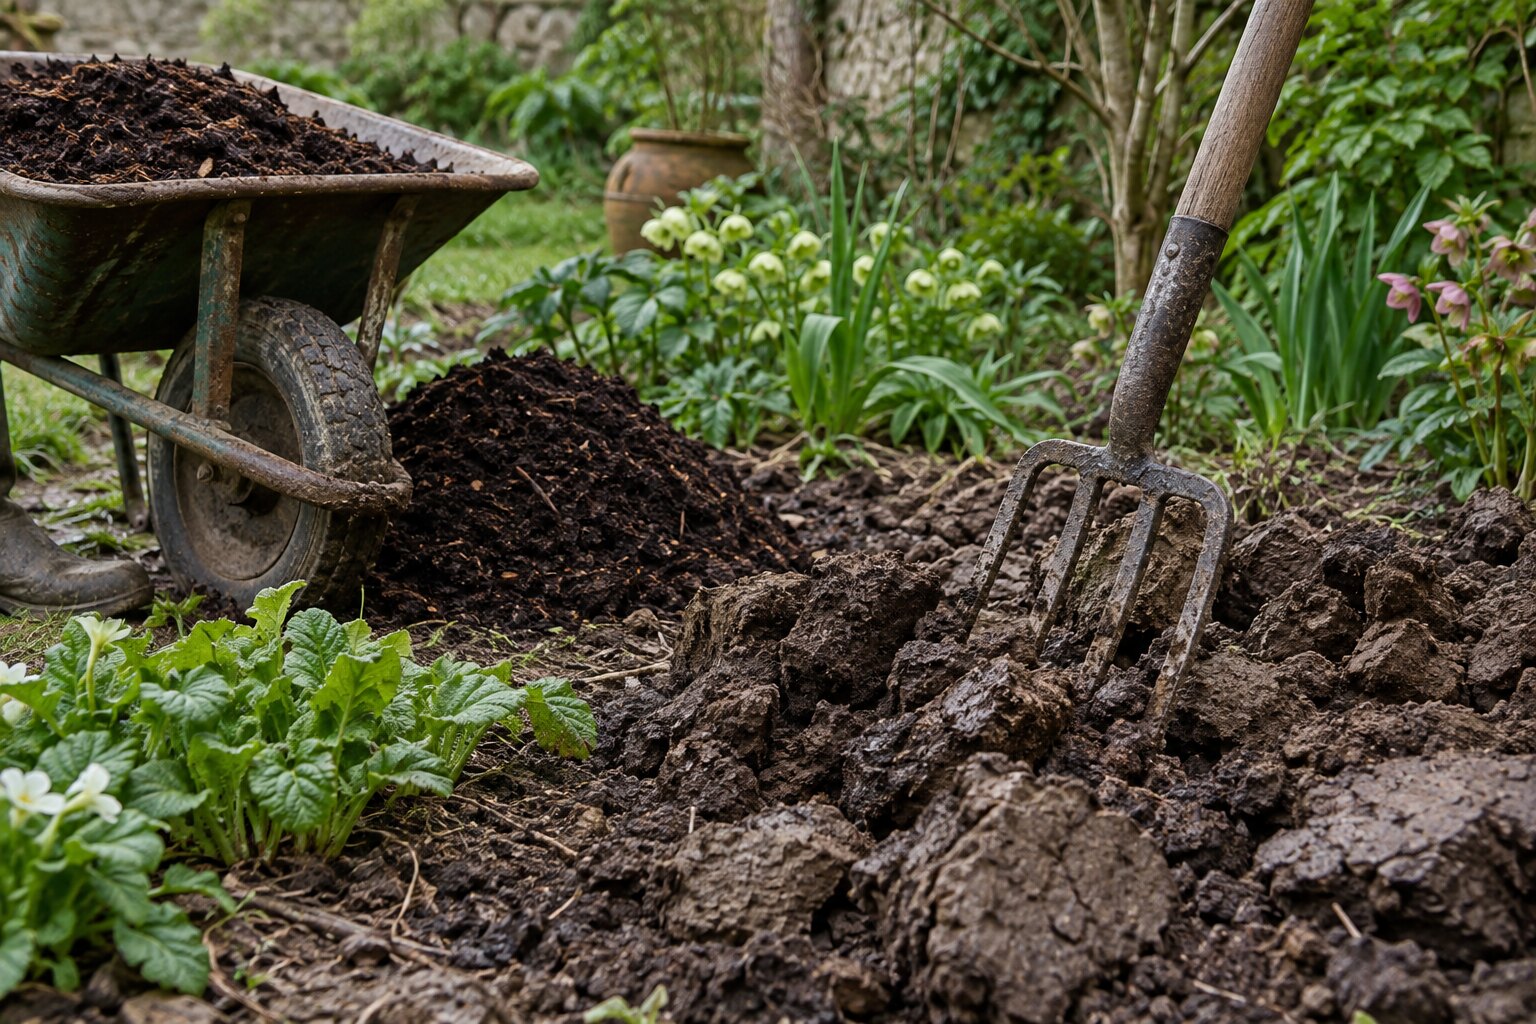
    Well-rotted compost, leaf mould and other suitable organic materials can improve the way clay aggregates into crumbs. This creates more spaces for air and water movement and makes the soil easier to work.

    Improvement is gradual. A single application will not transform an entire garden, but repeated additions over several seasons can make a substantial difference.

    Mulch rather than repeatedly digging

    Organic mulch spread over the surface allows worms, roots and soil organisms to incorporate material naturally. This avoids the repeated disturbance that comes with deep annual digging.

    Apply mulch when the ground is moist rather than trapping severe dryness below a thick surface layer.

    Protect the surface

    Bare clay can form a hard crust under heavy rain or direct sun. Plants and mulch protect the surface from this repeated impact.

    Dense planting has another advantage: roots create channels through the soil and contribute organic matter as fine roots die and regrow.

    Avoid adding small quantities of sand

    Adding a little sand to heavy clay is often recommended casually, but small amounts do not necessarily improve structure and in some conditions can create an unpleasant dense mixture.

    Large-scale mineral amendment requires a clear understanding of soil texture and substantial quantities of material. For most garden situations, organic matter and better cultivation habits are more practical.

    Improve drainage carefully

    Water sitting on clay does not always mean the soil itself is the only problem. Compaction, low spots and surrounding hard landscaping can all prevent water from moving away.

    Before installing drains or raising beds, understand where the water is coming from and where it can safely go.

    Choose plants that suit the soil

    Some plants grow extremely well in moisture-retentive clay, while others resent winter wet around their roots. Plant selection can therefore reduce the amount of correction the garden needs.

    A plant that naturally suits heavier soil will generally establish more reliably than a plant that requires constant intervention to survive there.

    New planting in clay

    Avoid creating a narrow planting hole filled entirely with light compost. Roots may remain inside that pocket instead of moving into the surrounding soil.

    Loosen a wider area and blend improvements more gradually into the existing soil.

    Reduce compaction

    Permanent paths or stepping routes are useful in beds that require regular access. They prevent repeated foot traffic from compacting the same garden soil you are trying to improve.

    Think in years, not weekends

    Clay responds well to patient management. Add organic matter, minimise unnecessary compaction, protect the surface and choose plants that appreciate moisture-retentive soil. The cumulative effect is far more useful than trying to rebuild the soil in one dramatic operation.

    See also A simple guide to garden compost and Peat-free compost in the garden.

  • When and how to mulch garden borders

    When and how to mulch garden borders

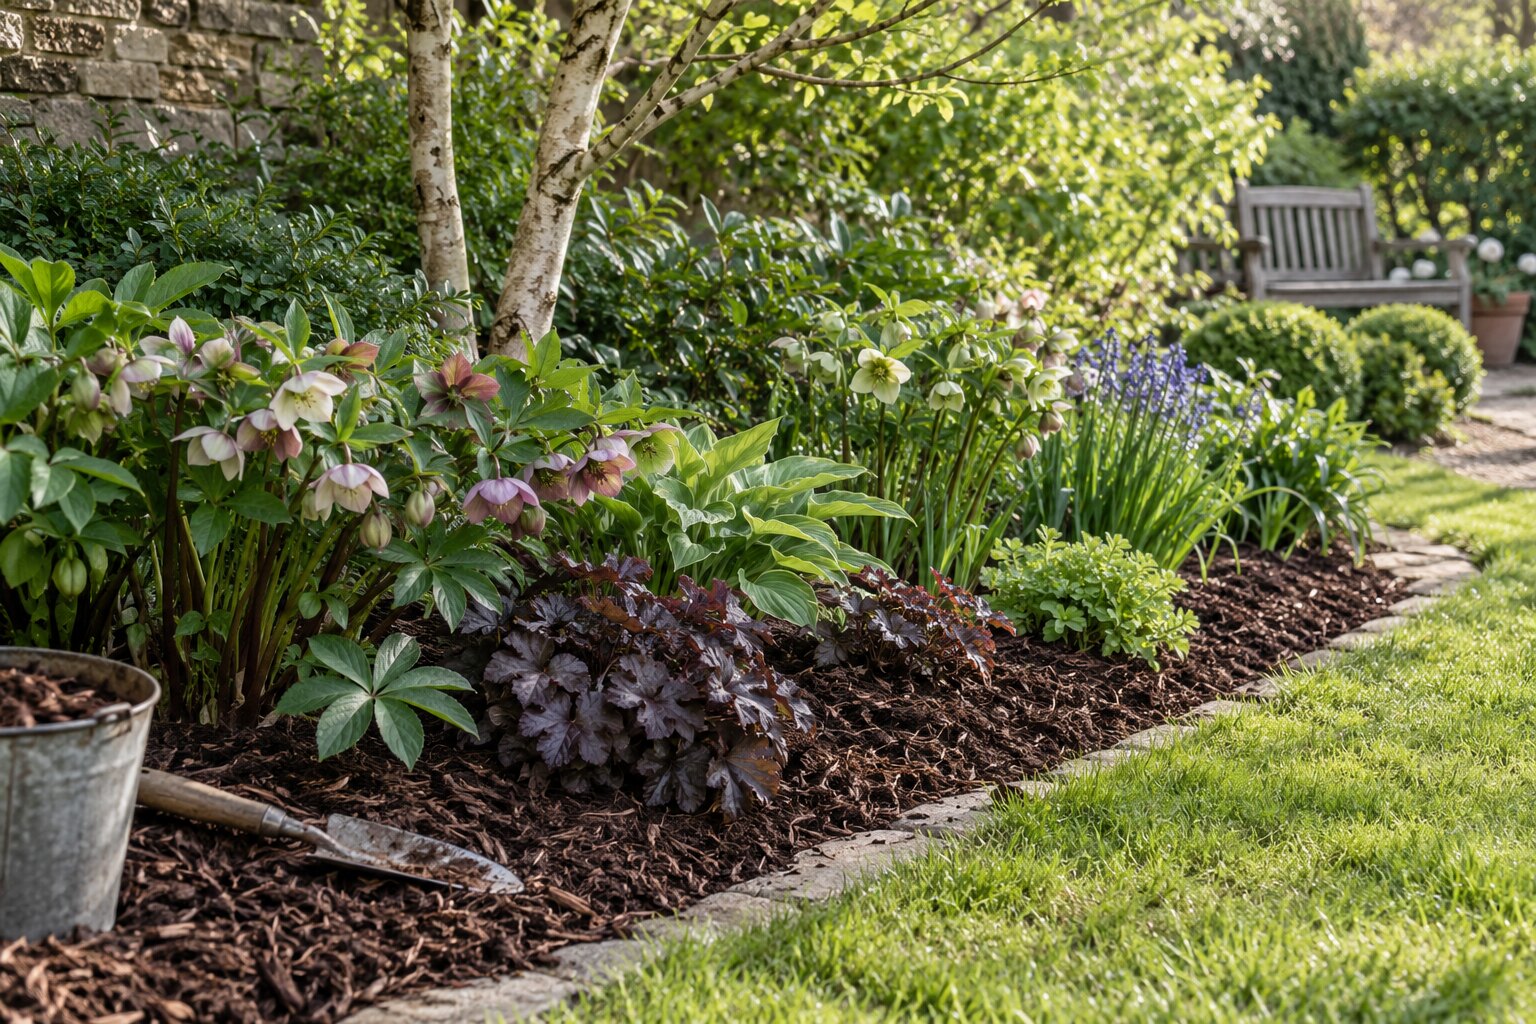
    Mulching is one of the simplest ways to improve the conditions around established plants. A layer of material placed over the soil surface can reduce moisture loss, suppress some weeds, protect the surface from heavy rain and gradually add organic matter.

    The benefit depends on using the right material, at the right depth and at the right time.

    When is the best time to mulch?

    Spring and autumn are both useful periods. In spring, mulch can help conserve moisture before warmer weather arrives. In autumn, soil is often still relatively warm and moist, and organic material can begin settling into the border over winter.

    Avoid applying a thick mulch over soil that is extremely dry. Water first or wait for useful rainfall so moisture is present below the surface.

    Prepare the border first

    Remove established perennial weeds before mulching. Mulch can suppress small annual weeds, but it will not permanently solve vigorous bindweed, couch grass or other persistent roots beneath the surface.

    Also remove thick mats of fallen material where disease is a concern.

    Which material should you use?

    Well-rotted garden compost, leaf mould and composted bark are common organic options. Each behaves differently. Compost breaks down relatively quickly and contributes organic matter, while coarser bark products can remain visible longer.

    The best material depends on the planting, the desired appearance and what is available locally.

    How deep should mulch be?

    A token dusting disappears quickly and does little to suppress weeds. A useful mulch generally needs enough depth to form a continuous layer, often several centimetres.

    More is not always better. Very deep material can bury small plants and crowns or create unsuitable conditions around stems.

    Keep mulch away from crowns and woody stems

    Do not heap mulch directly against tree trunks, shrub stems or the crowns of perennials. Leave a small clear space around vulnerable plant bases.

    This keeps the natural relationship between stem and soil intact and avoids creating continuously damp material against bark.

    Spread it over the whole useful area

    Mulch works best as a surface treatment, not as isolated piles around individual plants. Spread it evenly through the border where practical.

    Work around emerging bulbs and low plants rather than covering them blindly.

    Do you need to dig mulch in?

    Usually not. Leaving organic mulch on the surface allows natural soil processes to incorporate it gradually. Worms and other organisms move material downward over time.

    This approach also protects soil structure by reducing unnecessary cultivation.

    Mulch and slugs

    Organic mulch creates a cooler, moister surface environment, which can also provide shelter for slugs. This does not mean mulch should automatically be avoided, but young vulnerable plants may need closer monitoring.

    Keep mulch slightly away from the smallest seedlings and inspect susceptible areas regularly.

    Mulch is not fertiliser

    Some organic mulches contribute nutrients as they break down, but their main purpose is often soil protection and organic matter. Do not assume a mulch provides every nutrient a plant might need.

    Repeat when necessary

    Organic mulches decompose and become part of the soil. That is useful, but it means the visible layer becomes thinner over time. Check borders each year and top up where needed rather than following a fixed calendar regardless of conditions.

    A simple habit with cumulative results

    Regular mulching can reduce watering pressure, moderate soil conditions and gradually improve the upper layer of a border. Done consistently, it is one of the least disruptive ways to improve garden soil.

    Read more in A simple guide to garden compost, Watering the garden in dry weather and Slugs in the garden.

  • How to renovate a tired lawn

    How to renovate a tired lawn

    A lawn does not need to be perfect to be useful. Wear, compacted soil, thin grass and patches of moss or weeds are normal in a garden that is actually used. Before replacing an entire lawn, it is often worth renovating what is already there.

    Spring and early autumn are useful renovation periods because grass can grow actively while temperatures are moderate and soil moisture is easier to maintain.

    First decide what is wrong

    Thin grass can have several causes: shade, compaction, drought, poor drainage, low fertility, heavy wear or mowing too short. Renovation works best when it addresses the cause rather than merely adding more seed.

    Walk the lawn and note where problems occur. A patch under dense tree shade needs a different solution from a worn path across an otherwise healthy lawn.

    1. Mow before you begin

    Cut the lawn moderately short so you can reach the surface easily, but avoid scalping it. Collect heavy clippings if they would interfere with the work.

    2. Remove excessive thatch and dead material

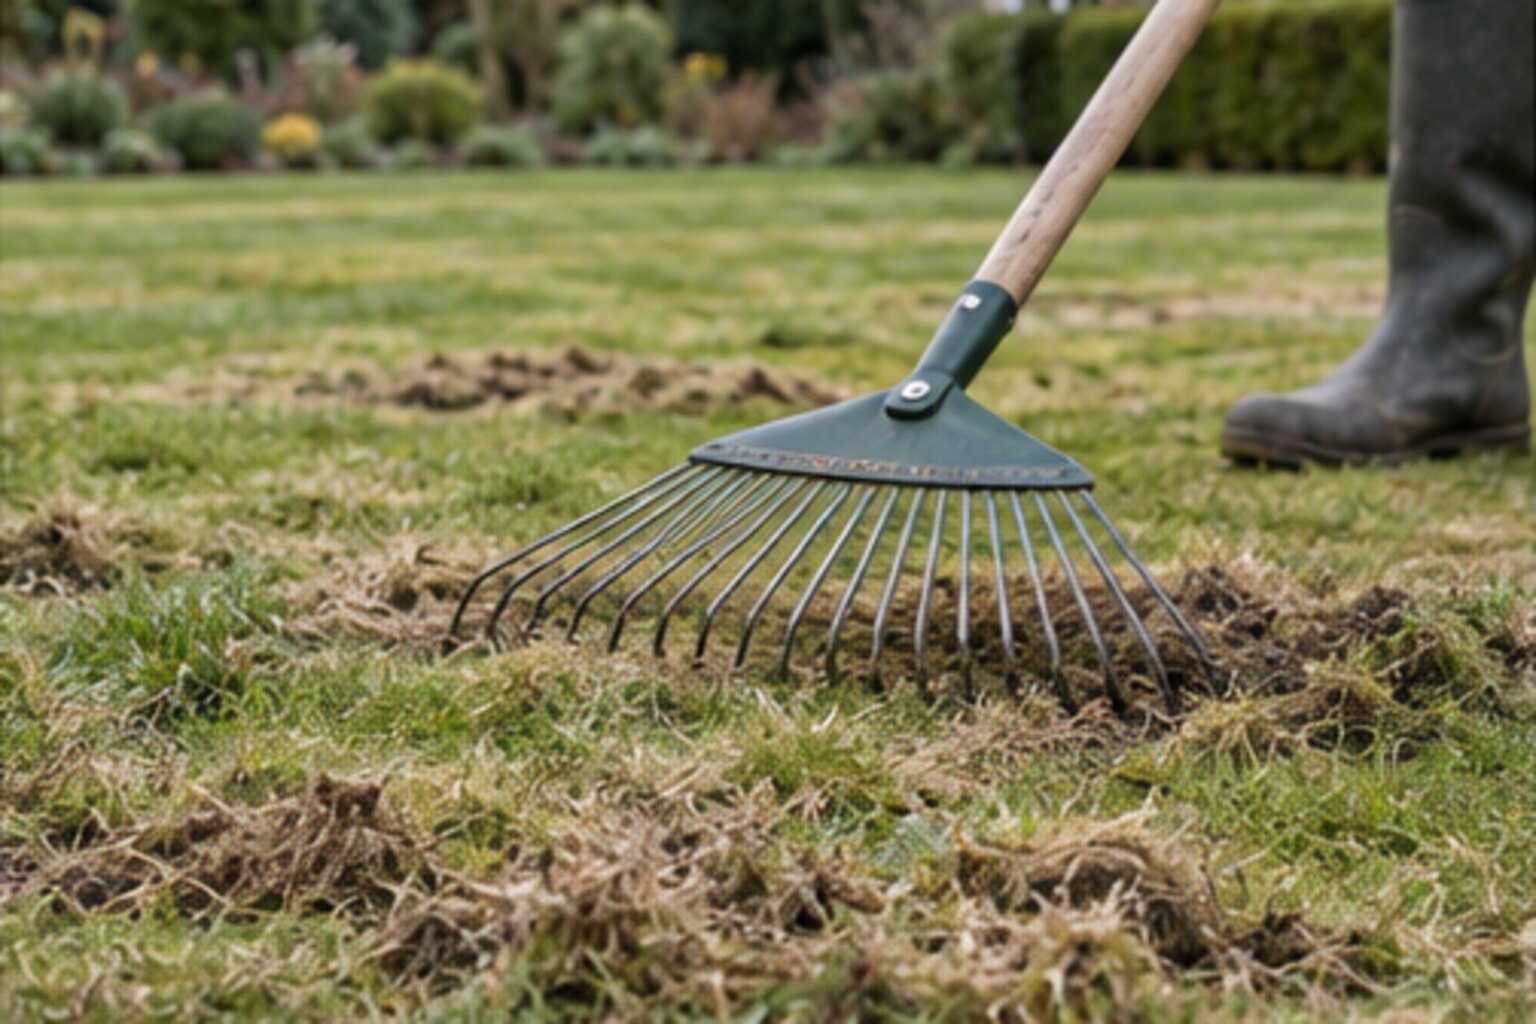
    Raking or scarifying can remove dead grass, moss and accumulated organic material from the surface. Do not assume every lawn needs aggressive scarification. A healthy lawn with little thatch may need only light raking.

    After this stage, the lawn can look worse temporarily. That is normal if a large amount of dead material has been removed.

    3. Relieve compaction

    Where the soil is compacted, aeration creates channels for air, water and roots. A garden fork can be adequate for a small lawn, while larger areas may justify a mechanical aerator.

    Concentrate effort where traffic is heaviest rather than treating every square metre identically.

    4. Overseed thin areas

    Choose a grass seed mixture suited to the conditions. Lawns in shade, family lawns and fine ornamental lawns need different mixtures.

    Seed must make contact with soil. Rake thin areas lightly, distribute seed evenly and press or firm it so it is not simply sitting on top of dead material.

    5. Top dress where appropriate

    A light suitable top dressing can help level small imperfections and improve seed-to-soil contact. Avoid burying existing grass beneath a thick layer.

    6. Keep new seed moist

    Germinating seed cannot tolerate repeated drying. Water gently and consistently until seedlings are established. Avoid heavy watering that washes seed into low spots.

    Do not mow new grass too soon

    Wait until the seedlings are tall and sufficiently rooted before the first cut. Use sharp mower blades and remove only a small portion of the height.

    Review mowing height

    Repeatedly cutting grass extremely short weakens it and makes dry weather more difficult. In many ordinary gardens, leaving the lawn slightly longer improves root depth and helps the grass compete more successfully.

    Consider whether every area needs to be lawn

    A permanently failing patch under deep shade or beside a heavily used route may be telling you something about the design rather than the grass.

    Alternative planting, stepping stones or a deliberately unmown area may be more successful than repeatedly repairing grass where conditions are unsuitable.

    Renovation before replacement

    Unless a lawn is fundamentally unsuitable or badly contaminated with perennial weeds, renovation is often faster, cheaper and less disruptive than removing everything and starting again.

    See also Watering the garden in dry weather and Should you leave part of the lawn unmown?.

  • How to tidy the autumn garden without overdoing it

    How to tidy the autumn garden without overdoing it

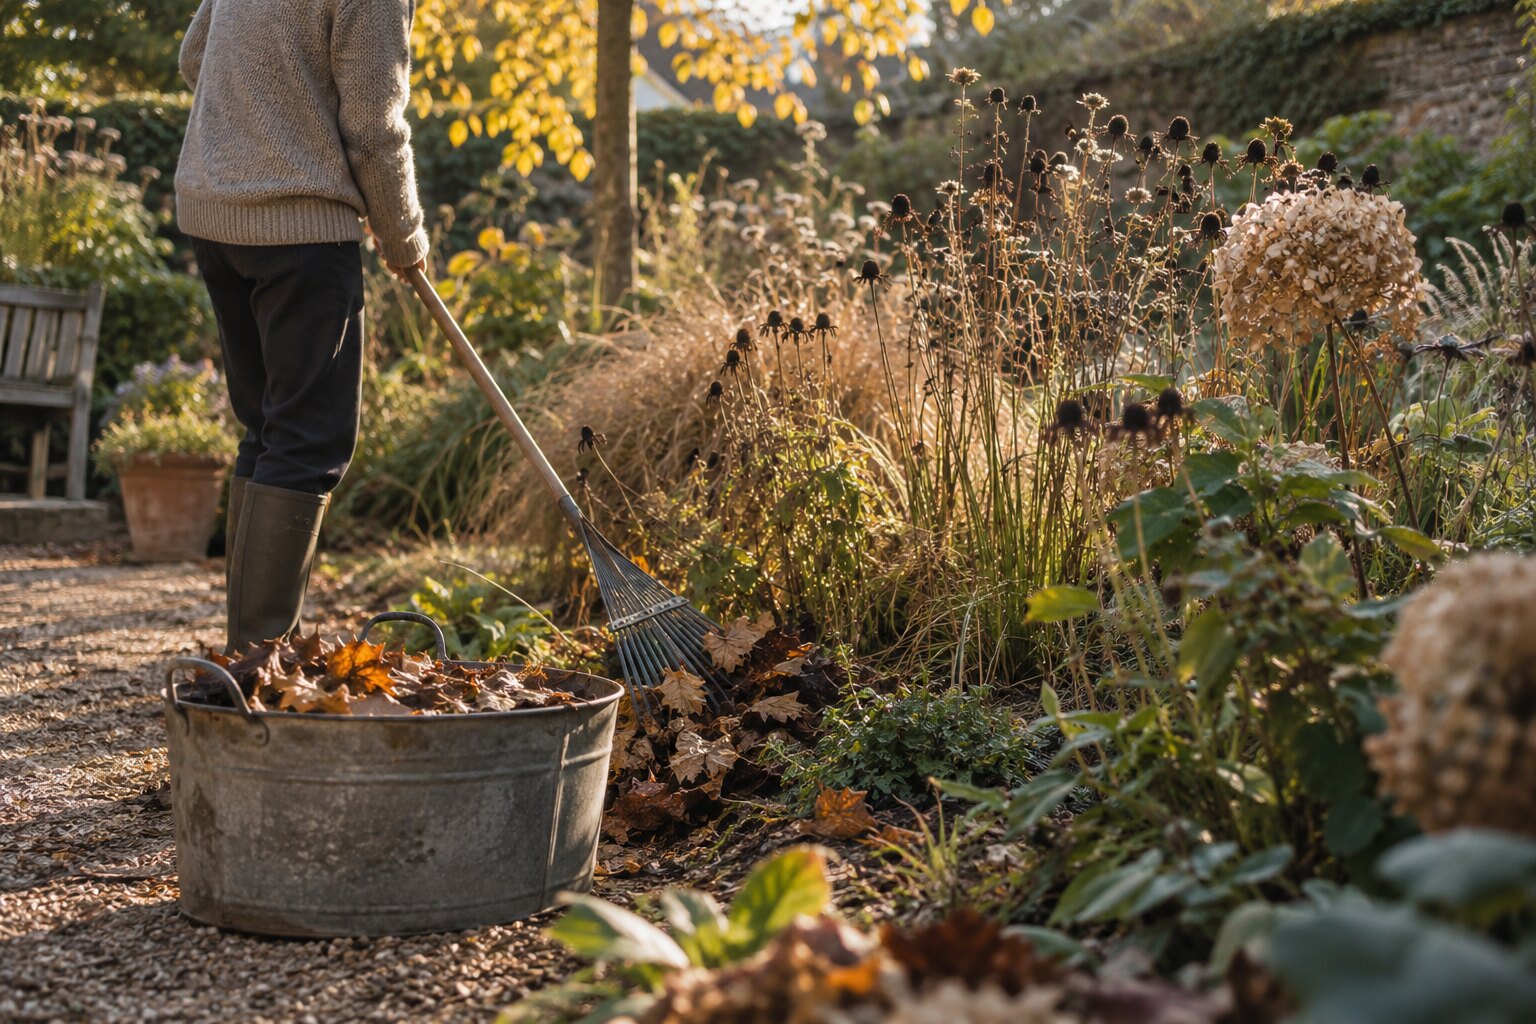
    Autumn used to be treated as the season for clearing the garden completely. Borders were cut to the ground, leaves were removed and every dead stem disappeared. A more selective approach is usually better for the garden and often looks better too.

    The aim is to remove what is genuinely diseased, dangerous or obstructive while leaving useful structure, seed heads and habitat where they can remain through winter.

    Start with what must be removed

    Diseased plant material deserves priority. Leaves and stems badly affected by certain diseases should not simply be left in place where they may contribute to future problems.

    Also remove collapsed growth from paths and access routes, broken branches and plants that are smothering small neighbours.

    Leave healthy perennial stems where useful

    Many ornamental grasses and perennials retain attractive structure through winter. Their seed heads catch low light and frost, while hollow stems and dense growth can shelter insects.

    Leaving these plants until late winter or early spring can extend the visual season and provide habitat at the same time.

    Do not remove every fallen leaf

    Leaves on paths, lawns and low evergreen plants may need clearing. Elsewhere they can be useful organic material.

    Move leaves from places where they cause problems into borders, under hedges or into a leaf-mould system rather than treating them automatically as waste.

    Keep lawns usable

    A thick wet layer of leaves can weaken grass, so lawns generally benefit from regular clearing during heavy leaf fall.

    Where desired, leave some less formal grass longer into winter rather than forcing the entire garden into the same management regime.

    Cut back plants that become a problem

    Not every dead perennial deserves to stay. Some collapse into a wet mass, hide paths or create ideal shelter directly around vulnerable crowns.

    Remove those selectively. The goal is not a rule that everything stays; it is choosing deliberately.

    Avoid disturbing the soil unnecessarily

    Autumn does not require every border to be deeply dug. Unless there is a specific reason, leave established soil structure intact.

    Remove perennial weeds carefully and mulch suitable areas instead of turning the whole border over.

    Check supports and ties

    Wind and winter weather expose weak supports. Check tree ties, climbing plant supports and stakes before storms make small problems larger.

    Loosen ties that are beginning to cut into stems and replace damaged supports.

    Protect vulnerable pots

    Containers are more exposed to frost because roots are surrounded by less insulating soil. Move vulnerable plants to more sheltered positions where appropriate and make sure drainage holes remain clear.

    Clean tools as the season slows

    Autumn is a useful time to clean soil from spades, forks and hand tools and check wooden handles, blades and moving parts. Tools stored clean and dry are easier to put back into service in spring.

    Leave food and shelter for wildlife

    Seed heads, leaf litter and dense planting all support wildlife through the colder months. A perfectly bare border offers very little shelter.

    Even a tidy garden can leave selected areas less disturbed.

    The garden does not need to look abandoned

    Selective autumn care can still look deliberate. Keep paths clear, edge important spaces, remove broken material and retain the strongest winter silhouettes.

    A good autumn garden is not one where nothing has been done. It is one where the right things have been left alone.

    See What to do with fallen leaves, Preparing the garden for winter, Making more room for wildlife and Keeping garden tools in good condition.
  • Aphids on garden plants: what to do

    Aphids on garden plants: what to do

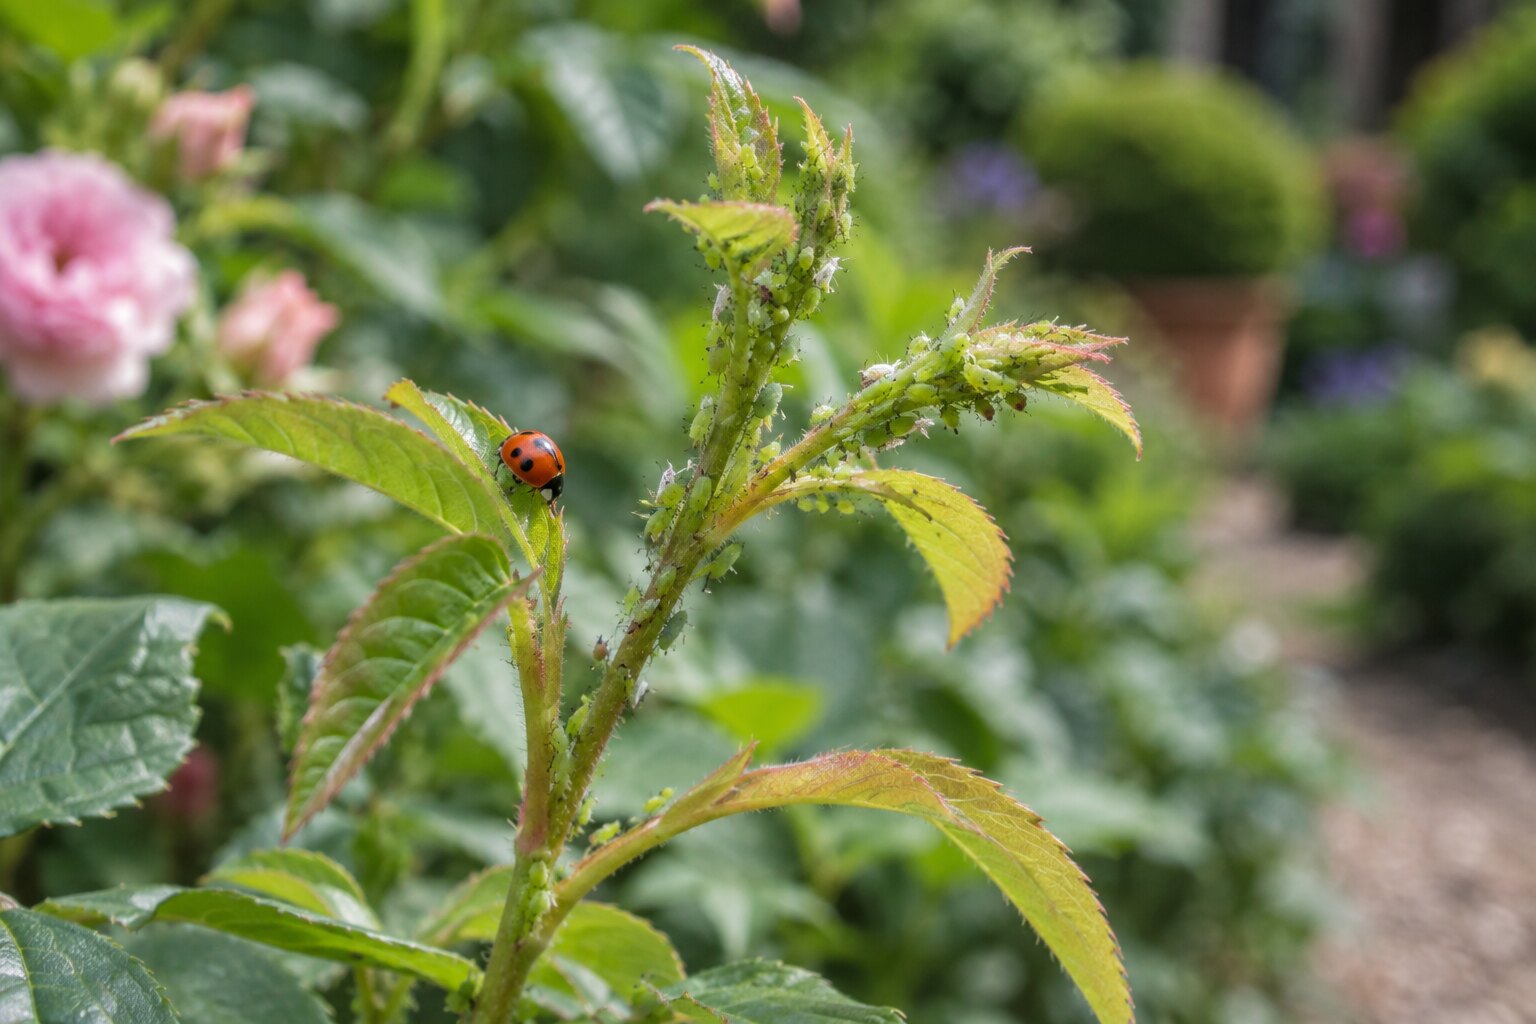
    Aphids are among the most familiar garden pests. They gather on soft new shoots, young leaves and flower buds, where they feed on plant sap. A few aphids are rarely a reason to panic, but large colonies can distort new growth, weaken young plants and produce sticky honeydew on leaves below.

    The most useful approach is to look at the whole plant before reaching for a treatment. In many gardens, predators such as ladybirds, hoverfly larvae, lacewings and birds reduce aphid populations naturally once spring is fully underway.

    How to recognise aphids

    Aphids are small, soft-bodied insects. Depending on species they may be green, black, grey, pink or other colours. Colonies are often concentrated on the youngest parts of a plant because this growth is tender and nutrient-rich.

    Look closely at curled leaves, distorted shoot tips and flower buds that are not developing normally. Ants moving repeatedly up and down a plant can also be a clue because they are attracted to the sugary honeydew aphids produce.

    Do aphids always need controlling?

    No. On a strong established plant, a modest aphid population may cause little lasting harm. Aphids are also an important food source for many beneficial insects and birds.

    Intervention is more useful where a colony is rapidly deforming new growth, overwhelming a young plant or heavily affecting a crop or ornamental feature you particularly value.

    1. Remove small colonies by hand

    On a small plant, the fastest control may simply be to rub or wipe aphids from affected shoots. This works particularly well when you spot a colony early.

    Check the undersides of leaves and the tightest growing tips, where insects can be hidden from casual view.

    2. Use water on sturdy plants

    A firm but controlled jet of water can dislodge aphids from robust stems and leaves. Once knocked from the plant, many do not find their way back.

    This method is unsuitable for delicate flowers, very young seedlings or brittle growth that can be damaged by the force of the water.

    3. Encourage natural predators

    Aphid populations often rise before predator numbers catch up. If a plant can tolerate some damage, giving the garden ecosystem time to respond can be effective.

    Grow a diverse range of flowering plants, avoid unnecessary broad-spectrum pesticide use and leave some shelter for beneficial insects. A garden that supports predators is less dependent on repeated intervention.

    Watch the ants

    Ants sometimes protect aphid colonies because they feed on honeydew. Their presence does not create the aphid problem, but heavy ant activity can make it harder for natural predators to reach a colony.

    If ants are farming aphids on a particular plant, focus first on the aphids rather than treating the whole garden for ants.

    Why weak plants may suffer more

    Very soft, lush growth can be particularly attractive to aphids. Excessive feeding, especially with high-nitrogen fertilisers, may produce large amounts of tender new growth that insects can exploit.

    Keep plants growing steadily rather than pushing them into unnaturally rapid growth.

    Should you remove badly affected shoots?

    Where only one or two tips are heavily infested and the plant can tolerate pruning, removing those shoots can eliminate a large proportion of the colony immediately.

    Do not cut away large amounts of valuable growth simply because a few insects are present.

    What about sprays?

    Any spray can affect more than the target pest, particularly when flowers are open and beneficial insects are active. Start with physical removal and natural control where practical.

    If a plant-protection product is genuinely required, use only a product legally approved for the plant and pest in your location, follow the current label exactly and avoid unnecessary treatment of flowers or non-target insects.

    Check the plant again after a few days

    Aphids reproduce quickly, so one intervention is not always enough. Recheck affected growing tips and repeat gentle control if necessary.

    Aphids are usually a management problem, not a disaster

    Healthy established plants can often tolerate more aphid activity than gardeners expect. The goal is rarely to eliminate every aphid from the garden. It is to prevent serious damage while keeping the ecological relationships that help control pests naturally.

    For another common pest, read Slugs in the garden. For supporting a more balanced garden ecosystem, see Making more room for wildlife.

  • Vine weevil in pots and containers

    Vine weevil in pots and containers

    Vine weevil is particularly troublesome in pots and containers because its larvae feed on plant roots below the compost surface. A plant can look reasonably healthy one week and then suddenly wilt or collapse even though the compost is moist.

    The adult beetles damage leaves, but the root-feeding larvae are usually the more serious problem. Understanding both stages makes control much more effective.

    Recognising adult vine weevils

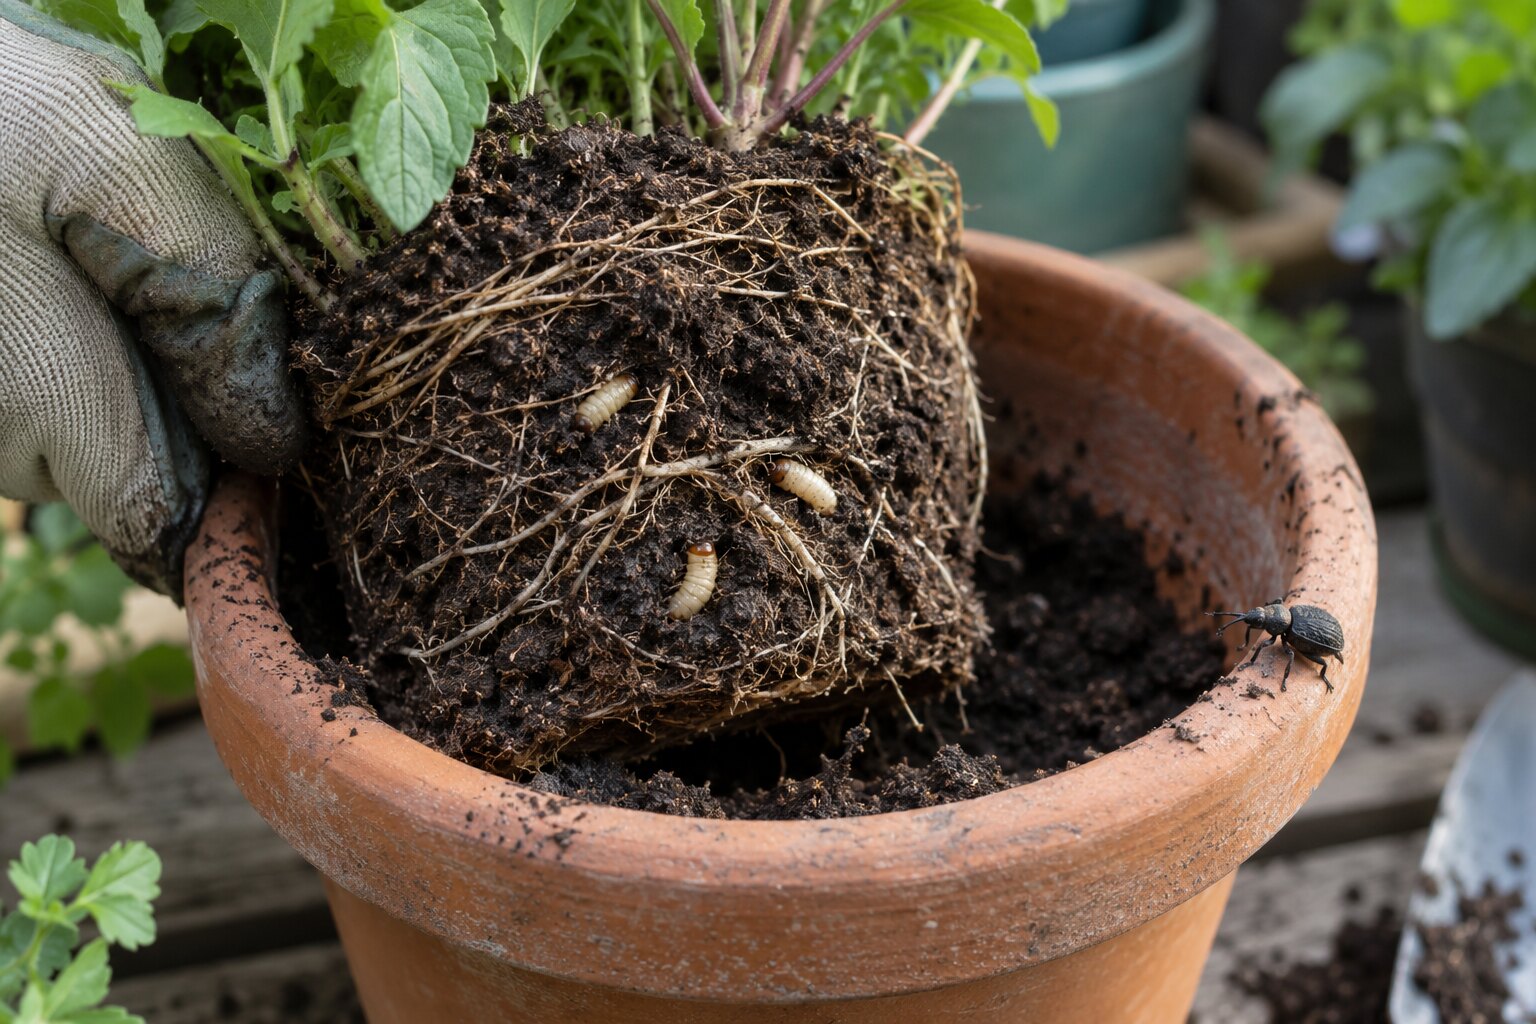
    Adult vine weevils are dark, flightless beetles that feed mainly at night. A common sign is irregular notching around the edges of leaves.

    Leaf notching is unattractive but often not fatal. The greater concern is that adults can lay eggs in compost and soil, leading to the larval stage below ground.

    Recognising the larvae

    Vine weevil larvae are pale, legless grubs with a brown head. They live in compost or soil and feed on roots and sometimes the lower crown of the plant.

    A severely affected container plant may become loose in its pot because so much of the root system has disappeared.

    Why pots are particularly vulnerable

    In a container, roots are concentrated in a small volume of compost. Larvae therefore have access to a large proportion of the root system and can cause serious damage quickly.

    Container-grown heucheras, primulas, fuchsias, cyclamen and many other ornamental plants can be affected, although vine weevil is not limited to these plants.

    1. Inspect suspicious plants

    If a plant suddenly wilts despite moist compost, gently check whether it is still firmly rooted. Where practical, remove the root ball from the pot and inspect the outer compost and root zone.

    Look for larvae and for roots that appear to have been eaten away.

    2. Remove larvae when you find them

    Physical removal is useful in containers because the root zone is accessible. Remove visible larvae and badly contaminated compost.

    Where the plant still has a viable root system, repot it into fresh suitable compost and monitor it closely while it recovers.

    3. Look for adult beetles at night

    Adults hide during the day beneath pots, boards, dense foliage and other sheltered places. Checking plants after dark with a torch can reveal beetles that were invisible during daylight.

    Hand collection can make a useful difference where only a small number of containers are involved.

    Biological control

    Beneficial nematodes are widely used against vine weevil larvae. They are living organisms and work only within suitable temperature and moisture ranges.

    Follow the supplier’s current instructions carefully. Applying nematodes to compost that is too cold, too dry or allowed to dry immediately afterwards can reduce effectiveness substantially.

    Do not assume every notched leaf means an emergency

    Adult feeding alone may be largely cosmetic. Use leaf damage as a warning to inspect containers rather than treating the leaves as the main problem.

    Check new plants

    Vine weevil can arrive with newly purchased container plants. Inspect root balls when repotting and pay attention to plants that look unexpectedly weak.

    Keep the growing area tidy but not sterile

    Stacks of unused pots and dense debris immediately around vulnerable containers can create hiding places for adult beetles. Basic housekeeping makes monitoring easier.

    There is no need to strip the wider garden of habitat. Concentrate on the places directly associated with susceptible pots.

    Can an affected plant recover?

    Yes, if enough healthy root and crown remain. Remove the larvae, repot where appropriate and reduce stress while the plant rebuilds its root system.

    Severely damaged plants with virtually no roots may not recover, especially if the crown itself has been eaten.

    The key is finding the problem below the surface

    Vine weevil is easy to misunderstand because the most damaging stage is hidden. When a container plant collapses unexpectedly, checking the roots is often more useful than looking for another problem on the leaves.

    For healthier container growing, see Peat-free compost in the garden.

  • Powdery mildew: causes, prevention and treatment

    Powdery mildew: causes, prevention and treatment

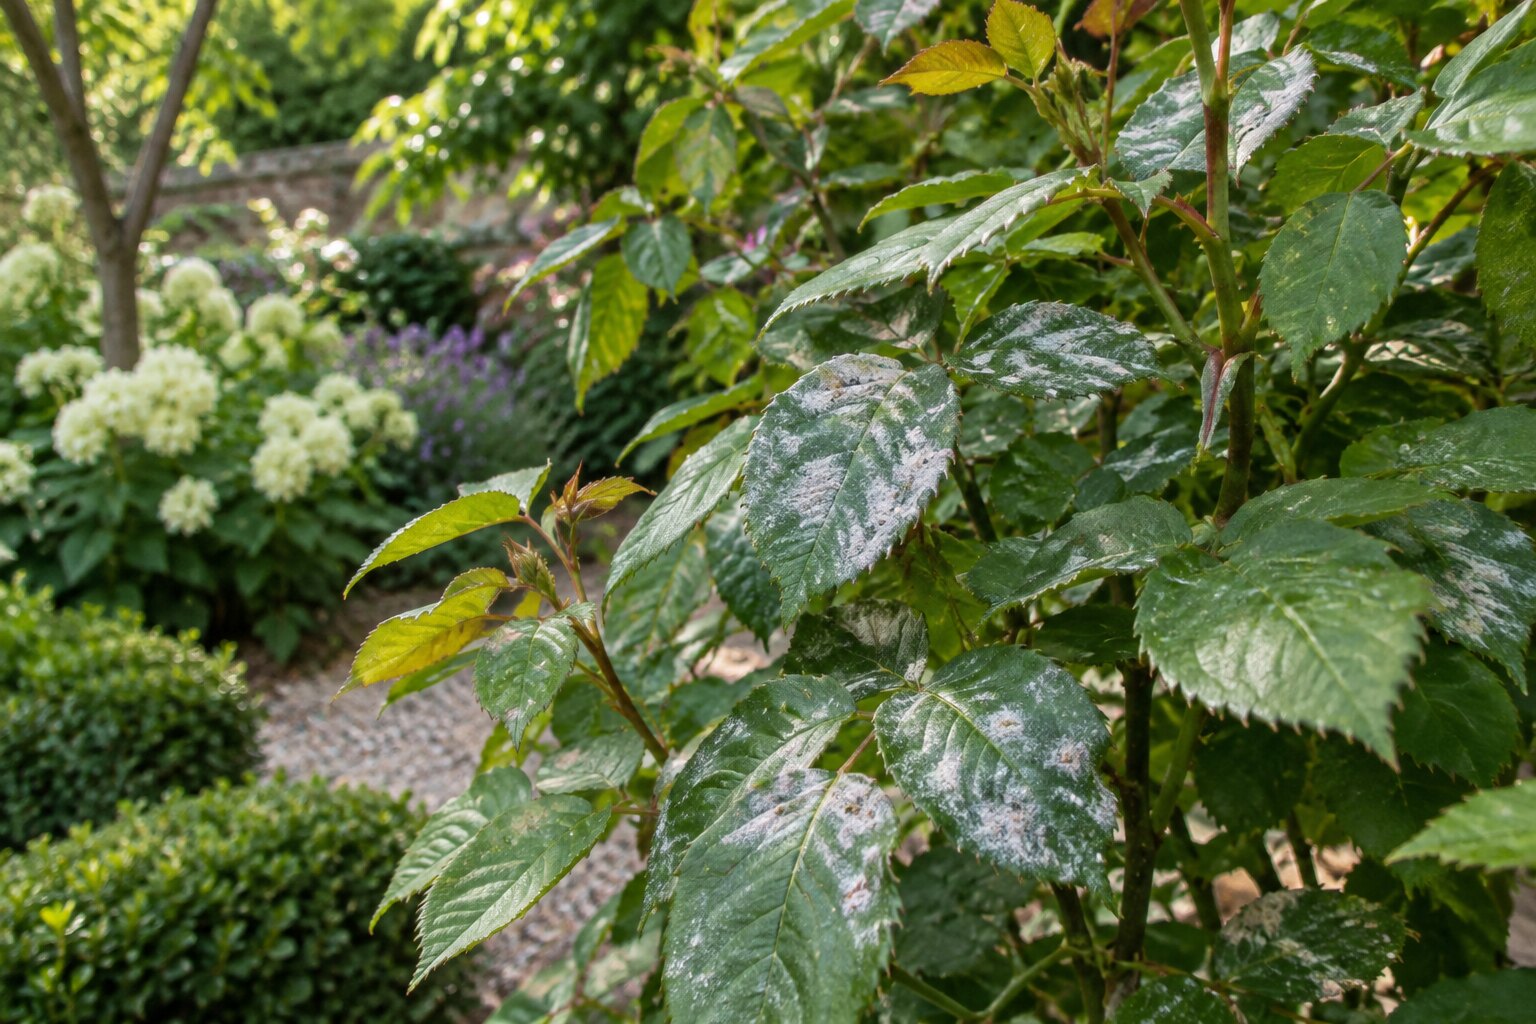
    Powdery mildew is a group of fungal diseases that produce a pale, powder-like coating on leaves and stems. It is common on many ornamental plants, vegetables and fruit crops, particularly later in the growing season.

    It rarely appears for one simple reason. Plant stress, crowded growth, dry roots, poor airflow and susceptible varieties can all contribute to the conditions in which mildew becomes noticeable.

    What does powdery mildew look like?

    The most obvious symptom is a white or grey powdery coating, often beginning as isolated patches on leaf surfaces. These patches can expand until a large part of the leaf appears covered.

    Heavily affected leaves may become distorted, discoloured or die prematurely.

    Powdery mildew is not one single fungus

    Different powdery mildew fungi affect different groups of plants. A mildew on one species does not automatically mean every plant nearby will develop the same disease.

    This is useful because management should focus on the affected plant and its growing conditions rather than treating the entire garden indiscriminately.

    Why dry roots can make mildew worse

    Powdery mildew often becomes conspicuous during warm, relatively dry periods. Plants suffering repeated drought stress can become more susceptible.

    Water deeply when needed so the root zone is adequately moist. Frequent superficial sprinkling encourages shallow roots and does little to help a plant through prolonged dry weather.

    Improve airflow

    Dense crowded growth creates a sheltered microclimate around leaves. Thin badly congested stems where appropriate and give plants enough space to develop.

    Do not prune indiscriminately simply to create airflow. The correct pruning method still depends on the plant.

    Water the soil rather than repeatedly wetting foliage

    Powdery mildew does not require continuously wet leaves in the same way some other fungal diseases do. Watering the root zone is still generally the most efficient way to support the plant and avoid wasting water.

    Remove badly affected material

    Where only a limited amount of growth is heavily affected, remove those leaves or shoots if the plant can tolerate it. Do not strip a plant of most of its foliage in an attempt to remove every visible patch.

    Clear heavily infected fallen leaves where appropriate rather than leaving large amounts of diseased material immediately below the plant.

    Avoid excessive nitrogen

    Very lush, soft growth can be more vulnerable to disease. Feed plants according to need rather than pushing them with repeated high-nitrogen applications.

    Choose resistant varieties where mildew is persistent

    Where the same plant suffers badly every year despite reasonable growing conditions, replacing it with a more resistant variety may be more effective than treating the disease repeatedly.

    This is especially useful in edible crops or ornamental groups where breeders have developed varieties with better resistance.

    Should you use a fungicide?

    Good growing conditions, appropriate watering and resistant varieties are the first line of management. Where a fungicide is considered necessary, use only a currently authorised product for the plant and disease in your location and follow the label exactly.

    Do not assume that repeated preventative spraying is automatically the best solution.

    What happens at the end of the season?

    Annual or deciduous foliage will eventually be removed naturally or during seasonal garden care. Clearing heavily diseased material can reduce the amount of infected debris around the plant, although spores may also arrive from elsewhere in future seasons.

    Think about the plant before the disease

    A little mildew late in the season on an otherwise healthy established plant may be largely cosmetic. A severe recurring infection on a stressed plant is more useful as a sign that the growing conditions, variety or maintenance need attention.

    For drought management, read Watering the garden in dry weather. For seasonal clean-up, see Preparing the garden for winter.

  • Black spot on roses: what actually helps

    Black spot on roses: what actually helps

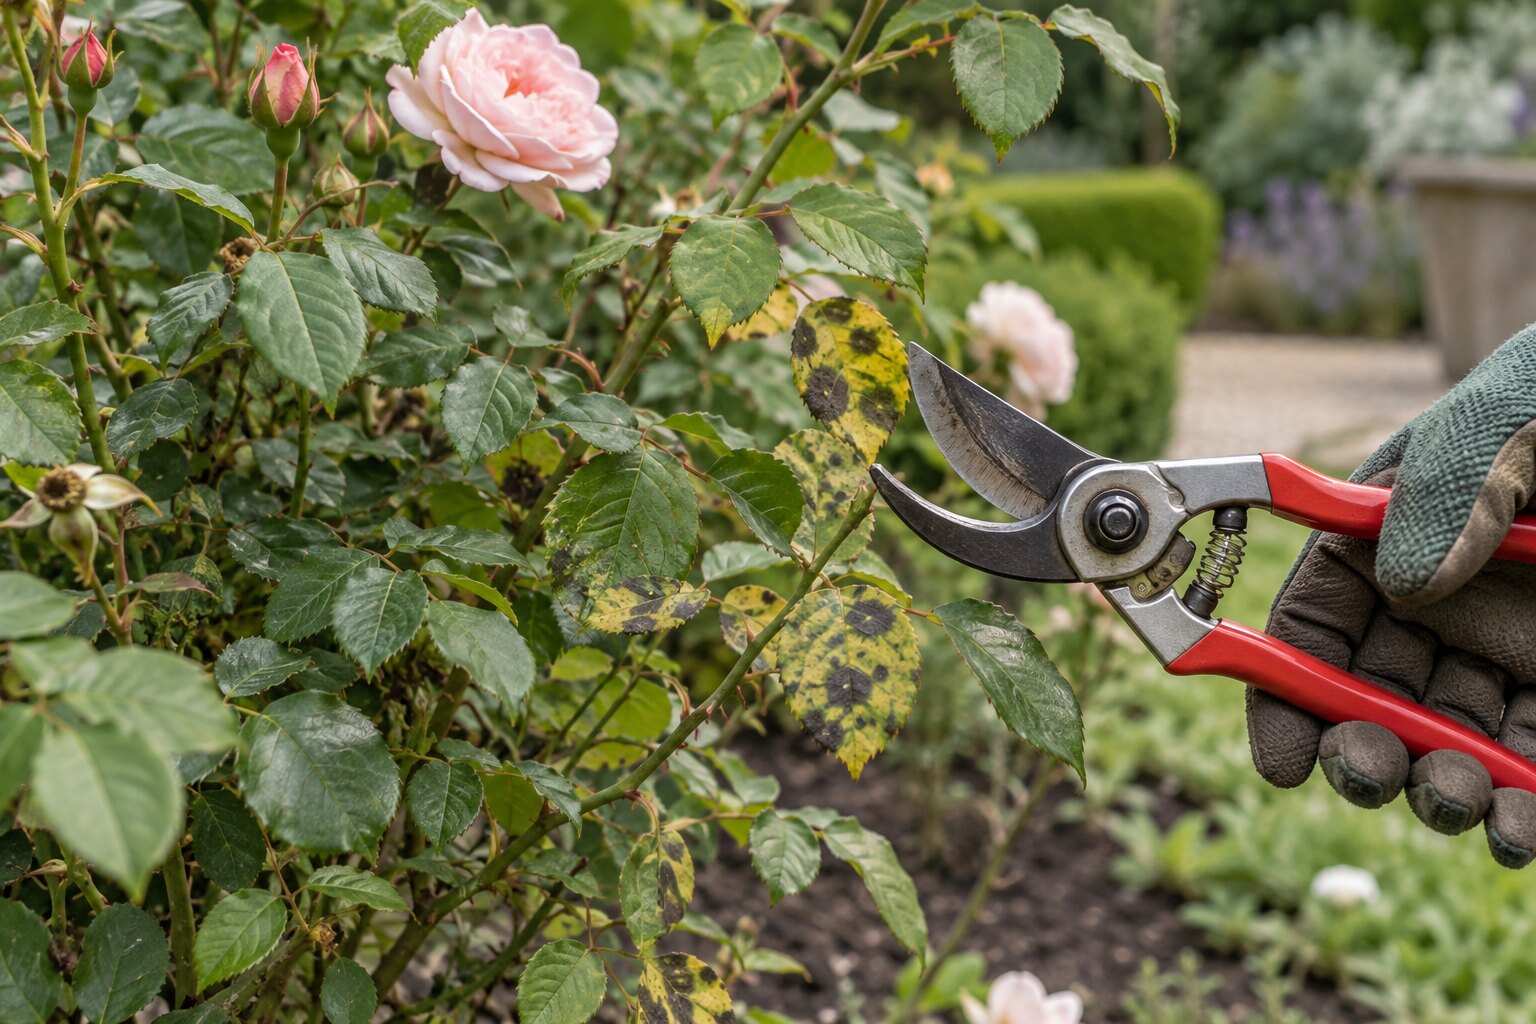
    Black spot is one of the most common diseases of garden roses. Dark spots develop on leaves, often surrounded by yellowing tissue, and badly affected plants can lose a large proportion of their foliage during summer.

    The aim of management is not necessarily to produce a rose with no marked leaf at all. It is to reduce repeated heavy infection so the plant keeps enough healthy foliage to grow and flower well.

    Recognising black spot

    Typical symptoms are irregular dark purple-black spots on leaves. The surrounding leaf tissue often turns yellow, and leaves may fall prematurely.

    Symptoms often begin on lower foliage and become more obvious as the season progresses.

    Why some roses suffer more than others

    Rose varieties differ greatly in their resistance. Some remain relatively clean in ordinary garden conditions while others become heavily affected every year.

    Growing conditions matter too. Dense planting, a sheltered humid position and stressed plants can all make disease management more difficult.

    1. Remove badly affected leaves

    Where practical, remove heavily infected leaves from the plant. Do not remove so much foliage that an already weak rose is left almost bare purely for cosmetic reasons.

    2. Clear fallen rose leaves

    Infected fallen leaves can contribute to disease carrying over around the plant. Collecting heavily affected rose foliage from beneath the plant is a sensible part of seasonal hygiene.

    This is particularly useful in autumn when a large amount of leaf material accumulates under established roses.

    3. Improve the structure of the rose

    Congested plants remain damp for longer and are harder to inspect. Appropriate pruning can open the framework and improve airflow through the plant.

    Pruning technique depends on rose type, so do not simply remove random stems during the growing season.

    4. Water at soil level

    During dry periods, water the root zone deeply rather than repeatedly wetting the foliage. Splashing water can help move fungal spores between leaves, and wet foliage can remain damp for longer in poorly ventilated positions.

    Good soil moisture also helps the rose maintain stronger growth and replace lost foliage.

    5. Mulch around the rose

    A suitable organic mulch can help moderate soil moisture and reduce the amount of soil splash reaching lower leaves.

    Keep mulch away from direct contact with stems and the crown.

    Avoid overfeeding

    A rose repeatedly pushed into very soft growth is not necessarily a healthier rose. Feed according to the needs of the plant and avoid assuming that strong fertiliser applications will compensate for disease.

    Choose resistant roses for new planting

    Variety selection is one of the most effective long-term tools. If you are planting new roses, consider disease resistance alongside flower colour, fragrance and mature size.

    A rose that remains healthy with modest care is usually more rewarding than one that needs repeated treatment to retain its leaves.

    Do fungicides solve black spot?

    Fungicides may be available for black spot in some regions, but they are not a substitute for good plant choice and growing conditions. Products and legal approvals change over time.

    If a fungicide is used, choose only one currently authorised for roses and black spot in your location and follow the label exactly.

    Should a badly affected rose be replaced?

    If the same rose loses most of its leaves every year despite appropriate care, replacement can be reasonable. Modern disease-resistant varieties can provide a similar garden effect with much less intervention.

    Manage the whole plant

    Black spot management works best when several small measures are combined: good variety choice, sensible pruning, reliable soil moisture, hygiene and appropriate spacing. No single action is likely to keep a highly susceptible rose completely clear in a bad disease year.

    For watering advice, see Watering the garden in dry weather. For plant selection, read Choosing plants for a sunny border.

  • Why are my plant leaves turning yellow?

    Why are my plant leaves turning yellow?

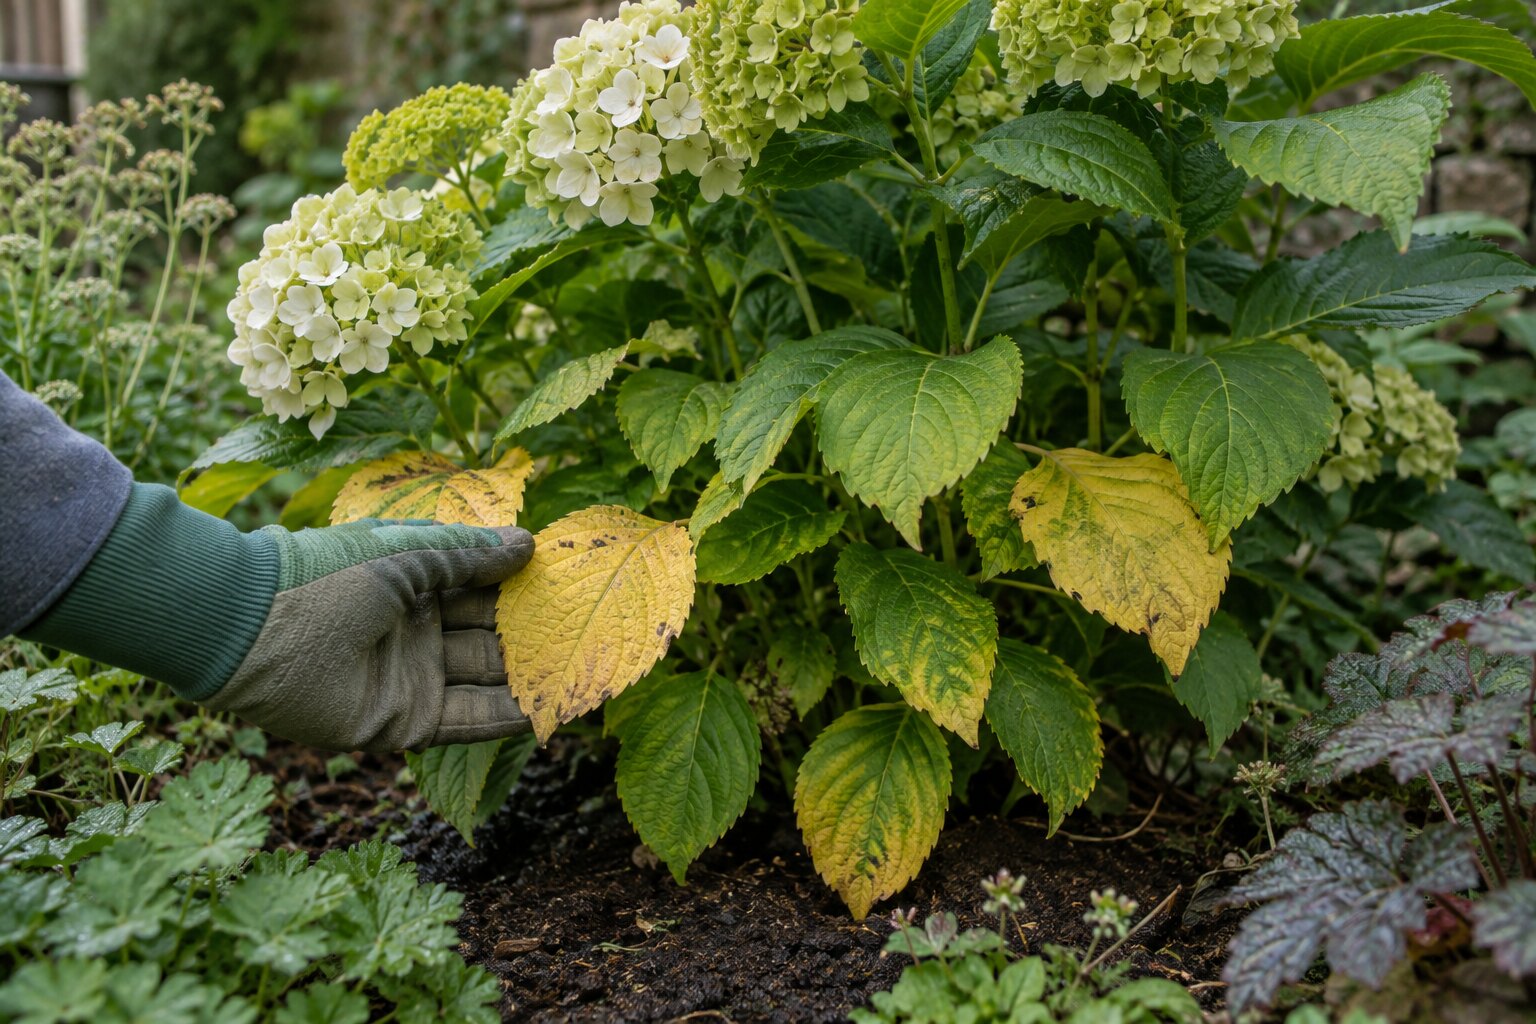
    Yellow leaves are a symptom, not a diagnosis. Plants lose their green colour for many reasons, from completely normal ageing to root damage, drought, waterlogging, nutrient problems or disease.

    The fastest way to make a wrong diagnosis is to see a yellow leaf and immediately add fertiliser. Instead, look at where the yellowing occurs, how quickly it developed and what changed around the plant recently.

    First ask: which leaves are yellow?

    Older lower leaves yellowing slowly can be part of normal leaf ageing, particularly as a plant redirects resources into new growth or towards the end of its season.

    Yellowing on the newest leaves, by contrast, may suggest a different problem involving nutrient availability, root conditions or active growth.

    Look at the pattern

    Uniform yellowing across the whole leaf suggests something different from green veins surrounded by pale tissue, scorched leaf edges or irregular yellow patches.

    Take a moment to compare several leaves rather than focusing on one damaged example.

    Check soil moisture before anything else

    Both drought and waterlogging can cause leaves to yellow because roots are unable to supply the plant normally.

    Push a finger into container compost or inspect the soil around garden plants. Do not judge moisture only by looking at the surface.

    Yellow leaves and overwatering

    Roots need oxygen as well as water. Constantly saturated compost can suffocate roots and encourage decay. The plant may wilt even though the compost is wet because damaged roots can no longer move water effectively.

    In pots, check that drainage holes are open and that the container is not standing permanently in water.

    Yellow leaves and drought

    A plant repeatedly allowed to dry severely may shed older leaves to reduce water loss. Containers are especially vulnerable because a limited compost volume can dry rapidly in sun or wind.

    Water deeply enough to moisten the root zone rather than giving frequent tiny amounts.

    Could the plant be hungry?

    Nutrient shortage is possible, particularly in containers where nutrients are gradually washed out or used by the plant. But deficiency should not be assumed before checking moisture and roots.

    Feed according to the plant, season and growing medium. Too much fertiliser can damage roots and create a new problem.

    Soil pH can affect nutrient availability

    Some plants struggle to absorb particular nutrients when grown in soil with an unsuitable pH, even if those nutrients are technically present.

    Acid-loving plants grown in strongly alkaline conditions are a common example. In a persistent unexplained case, a soil test can be more useful than guessing.

    Check the roots

    A root-bound container plant may have used most of the available compost and water very quickly. Lift the root ball where practical and see whether roots are circling densely around the pot.

    Also look for dark, soft or foul-smelling roots that may indicate prolonged waterlogging or decay.

    Pests and diseases

    Some insects, mites and diseases cause yellowing or mottling. Inspect both sides of the leaves, stems and growing tips.

    Do not attribute every yellow leaf to disease unless there are additional symptoms that support the diagnosis.

    Has the weather changed?

    Cold nights, heatwaves, strong wind and sudden changes in light can all produce temporary leaf damage. A recently planted specimen may also yellow while its root system is adjusting.

    A simple diagnostic order

    • Check whether the yellowing is normal seasonal ageing.
    • Check soil or compost moisture.
    • Inspect drainage and the roots.
    • Consider recent heat, cold or transplant stress.
    • Inspect for pests and disease symptoms.
    • Only then assess feeding and nutrient availability.

    Treat the cause, not the colour

    Once a leaf has turned fully yellow, it will often not become green again. Success should therefore be judged by the new growth that follows after the underlying problem is corrected.

    For moisture management, read Watering the garden in dry weather. For compost and growing media, see Peat-free compost in the garden.

  • How to deal with waterlogged garden soil

    How to deal with waterlogged garden soil

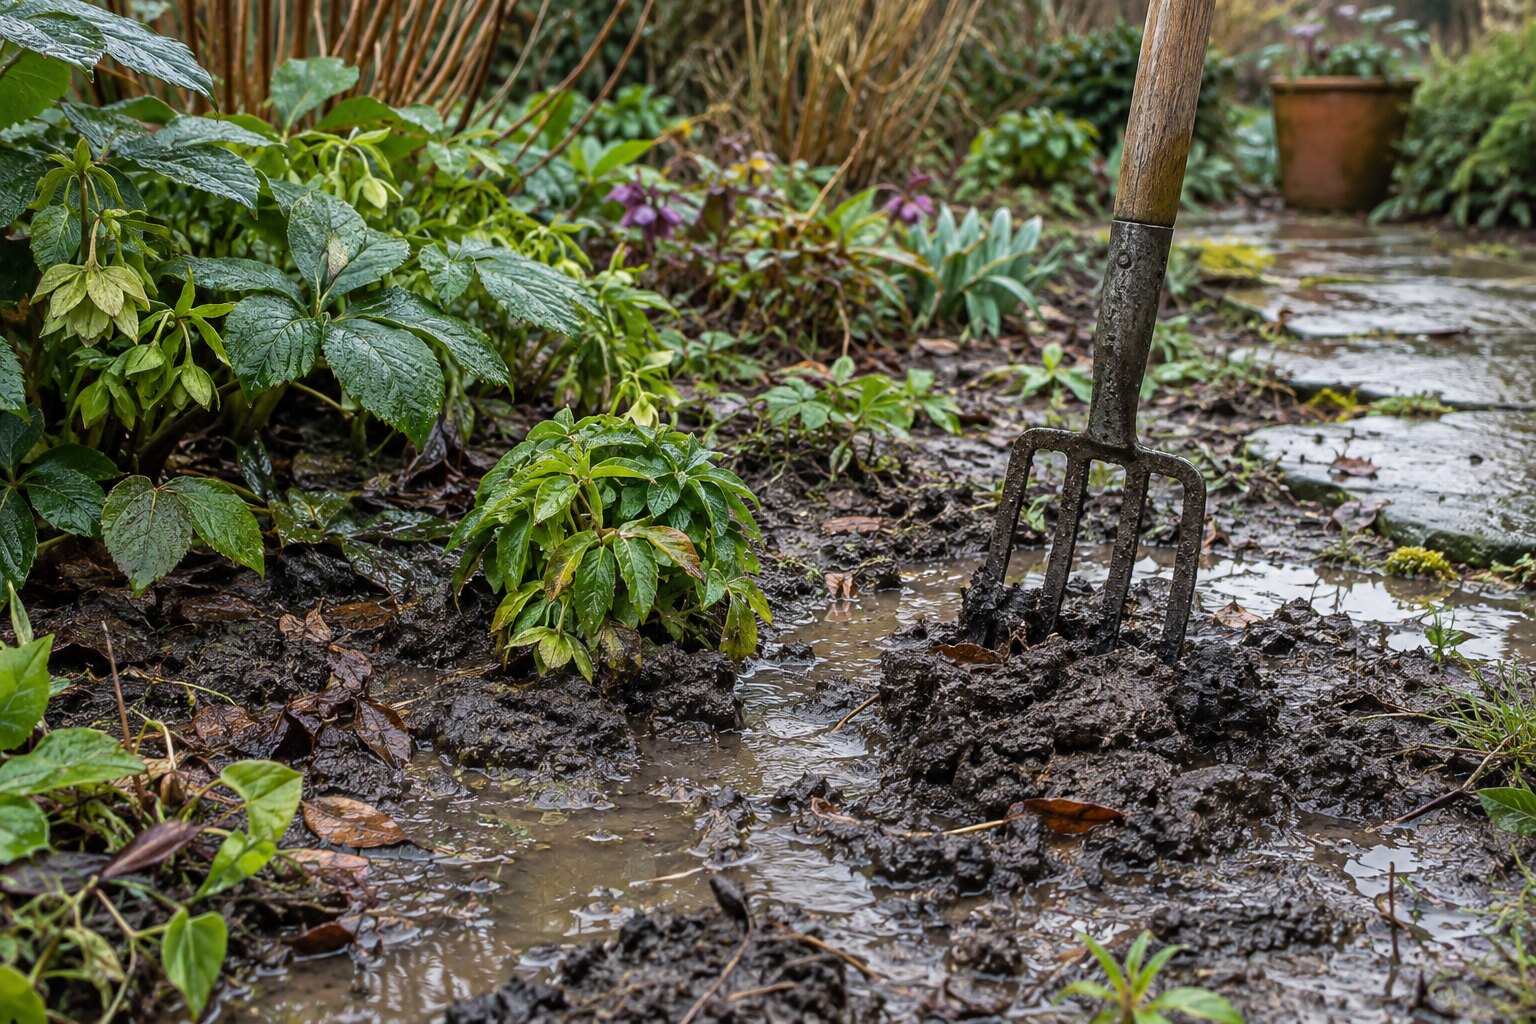
    Waterlogged soil is more than simply wet soil. When water fills most of the spaces that normally hold air, plant roots can struggle to breathe. If the condition persists, roots weaken or die and plants may become yellow, stunted or unstable.

    The correct solution depends on why the water is present. Heavy soil, compaction, a high water table, a low point in the garden and runoff from surrounding surfaces can all produce similar symptoms.

    Do not start digging while the soil is saturated

    Walking and digging on saturated soil can cause severe compaction and smear the sides of planting holes. This is especially damaging on clay.

    If possible, keep off the affected area until some water has drained and the soil is workable again.

    Work out where the water comes from

    Observe the garden during and after heavy rain. Does water collect in one hollow? Does it run from a paved area or neighbouring higher ground? Is the entire garden saturated or only one bed?

    Understanding the source prevents you from installing a solution in the wrong place.

    Check for compaction

    Construction work, repeated foot traffic and machinery can create compacted layers that slow drainage dramatically.

    Once conditions are suitable, test the soil with a fork or spade. If penetration becomes suddenly difficult at a consistent depth, a compacted layer may be part of the problem.

    Improve soil structure gradually

    Organic matter can improve the structure of heavy soils over time. Mulching with suitable compost or leaf mould encourages biological activity and better aggregation.

    Do not expect one application to transform a persistently wet site. Soil improvement is cumulative.

    Avoid creating a planting sump

    On heavy soil, a deep planting hole filled with very free-draining compost can behave like a bucket surrounded by less permeable ground. Water may collect around the roots rather than disappear.

    Improve a wider area where possible and keep the planting medium reasonably compatible with the surrounding soil.

    Raised beds can help in the right place

    Raising the root zone above persistently saturated ground can improve conditions for plants that need better drainage. This is particularly useful in kitchen gardens and defined planting areas.

    A raised bed does not remove the underlying water, so it should not block natural drainage or send water towards buildings or neighbouring land.

    Choose plants that tolerate the conditions

    If a site is naturally moisture-retentive, working with the conditions can be more successful than trying to make every part of the garden dry.

    Many plants tolerate moist soils well, while others require sharp drainage. Match the plant to the site rather than repeatedly replacing plants that dislike the conditions.

    When drainage work may be necessary

    Where waterlogging is severe, persistent and caused by site drainage rather than soil structure alone, professional drainage advice may be appropriate.

    Any drain needs a legitimate outlet. Moving water from one part of the garden only to create a problem elsewhere is not a solution.

    Protect vulnerable plants during a wet winter

    Plants in the worst positions may need lifting or moving if their roots are clearly at risk. Container plants should have unobstructed drainage holes and should not sit in permanently full saucers outdoors.

    Signs of root stress

    • Leaves yellow despite the soil being wet.
    • Plants wilt even though water is present.
    • Growth becomes weak and stunted.
    • Roots are dark, soft or decaying.
    • Plants become loose because roots have died.

    Waterlogging is a site problem first

    The most durable solution comes from understanding the movement of water through the garden. Improve compacted soil, protect structure, use organic matter, adapt planting and install drainage only where there is a clear reason and a safe outlet.

    For soil improvement, read A simple guide to garden compost and Peat-free compost in the garden. For winter conditions, see Preparing the garden for winter.